Setting Up a Loyalty Tiers Program in Shopify and Shopify Plus
- DarkLight
Setting Up a Loyalty Tiers Program in Shopify and Shopify Plus
- DarkLight
Article summary
Did you find this summary helpful?
Thank you for your feedback
Goals and Outcomes
Building a flexible tier-based program is a powerful way to nurture brand loyalty. With customizable tier structures, you can offer exclusive perks, rewards, and recognition that boost engagement, drive retention, and increase customer lifetime value. The new Loyalty Tiers program is a fully rebuilt version of Yotpo’s legacy VIP Tiers program with improved flows, capabilities, and analytics.
In this article, you’ll learn how Yotpo’s Loyalty Tiers work, how to create a tiered program, and how to manage your tiers over time.
Is this article for me?
If you joined Yotpo Loyalty & Referrals before August 11, 2025, please refer to this legacy VIP tiers guide.
Loyalty Tiers Program Overview

How It Works
Yotpo’s Loyalty Tiers program allows you to create up to four customer tiers based on predefined entry criteria. Once customers meet these entry requirements, they unlock tier-specific benefits and move up in the program.
The main elements of the program include:
Tier term (e.g., 12 months, lifetime, etc.)
Tier entry thresholds (e.g., spend amount, points earned, etc.)
Tier-specific benefits (e.g., birthday reward, points multipliers, etc.)
Automatic or manual tier assignment
Tier Terms
Tier terms define how long a customer will keep their Loyalty tier status once they’re eligible to enter the program. You have three options:
12 months: Customers will retain their tier for 12 months from the date they entered the tier. For example, if a customer enters a tier on March 3, 2024, they will keep that tier status until March 3, 2025, unless they move up or down based on updated eligibility.
Lifetime: Once entered, customers will retain the tier permanently unless downgraded due to refunds.
Calendar year: Customers will retain the tier through the current calendar year and the following year. For example, if a customer enters a tier in November 2024, they will retain that tier until December 31, 2025.
Important
Tier terms do not apply to the base tier. Customers will stay in this tier until:
They qualify for a higher tier.
They opt out or are removed from the loyalty program.
Limitations
Maximum four tiers per program: Currently, you can create up to three custom tiers, plus one automatically generated base tier.
Program availability: Only available to Shopify and Shopify Plus merchants who started onboarding after August 11, 2025, and who use Klaviyo as their ESP.
Feature support: The Loyalty Tiers program is not supported in multi-store setups.
Handling Refunds
Refunds can affect tier eligibility based on the date of the refund, not when the purchase was made. When a refund occurs, the system evaluates eligibility depending on the tier term you selected for the program:
12 months: Looks back 12 months from the refund date.
Calendar year: Considers only the current calendar year.
Lifetime: Reviews the customer’s full purchase history.
If a refund causes a customer’s points or spend to fall below the configured threshold, they will be downgraded to a lower tier, and their tier expiration will reset.
Loyalty Tier Entry Criteria
Tier Threshold Types
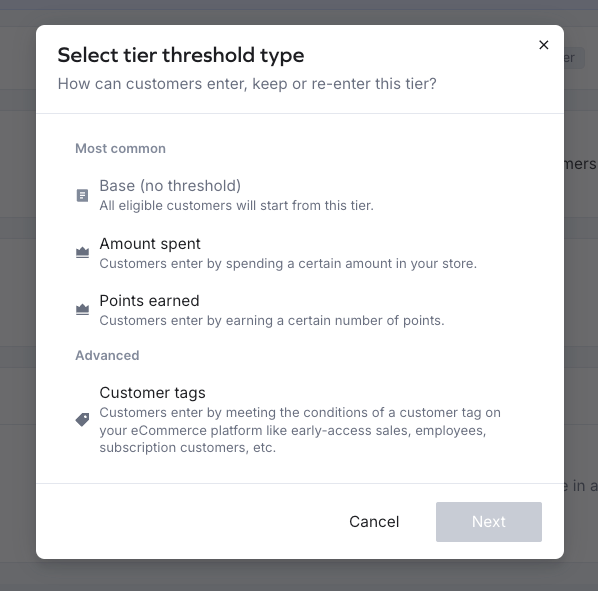
When creating a Loyalty tier, you must first select how customers can enter, keep, or re-enter tiers. You have the following tier threshold options:
Base (no threshold): This is a pre-built tier that all eligible customers start from. It doesn’t grant entry rewards or benefits.
Default threshold: These are the two main thresholds. You can choose only one per program:
Amount spent: Tier entry is based on customers spending a certain amount in your store.
Points earned: Tier entry is based on customers earning a certain number of loyalty points.
Customer tags (advanced): Customers qualify based on specific tags in your eCommerce platform (e.g., early access, employee, subscription, etc.). If a customer has multiple tags and your program has multiple tag-based tiers, the customer will be placed in the highest tier. Customer tags are case sensitive!
Important
You can select only one default threshold type per program – Amount Spent or Points Earned.
Manual Tier Assignment
In addition to the automatic tier assignment, you can also manually assign customers to a specific tier via the Yotpo UI. The manual tier assignment will override any automatic tier placement, regardless of how the customer entered the tier.
How it works
Manual tier assignment can place a customer either in the same or higher tier.
You must define the tier duration. It can either be a specific date or indefinite.
If a customer who was manually assigned a tier later qualifies for a higher tier organically, they’ll be automatically upgraded, and the manual assignment will end.
Example: A customer is manually placed in Tier 2 for one year. After six months, the customer meets the spend threshold for Tier 3. The system automatically upgrades them to Tier 3, and the manual period ends early.
After the manual assignment period ends, the system will re-evaluate the customer’s eligibility and assign the appropriate tier.
Important
Manual tier assignment can only be done while the Loyalty Tiers program is active.
When the program is inactive, manual tier assignment is only available for test customers.
Manual tier assignment cannot be reverted and cannot be used to downgrade a customer’s tier.
How to manually assign a tier
From your Yotpo Loyalty admin, go to Customers.
Select a customer you want to edit.
On the customer page, click Manual Tier Assignment in the lower-left corner.
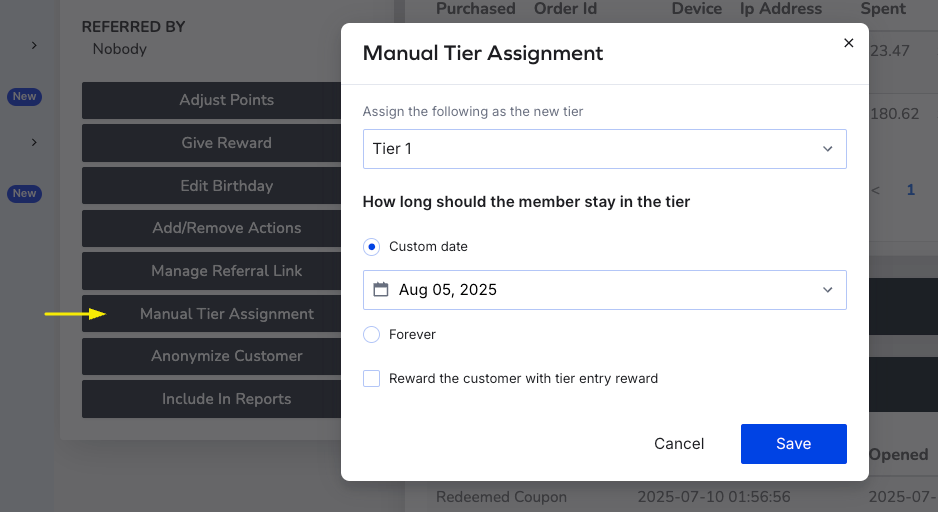
Assign the new tier to the customer from the dropdown.
Choose how long the customer will stay in the new tier: either a custom date or Forever.
(Optional) Check the box to award the tier entry reward.
Click Save to apply the changes.
How to Create Loyalty Tiers
Creating Loyalty Tiers
To create Loyalty tiers, follow these steps:
Log into your Yotpo Loyalty admin.
Go to Manage Program > Loyalty Tiers.
Click to create a new program.
Select a tier type from the modal.
Choose a tier term and click Next.
Configure your program: The system will automatically generate a three-tier template program you can customize:
Edit the pre-existing tiers by clicking the pencil icon on hover.
Click the Plus button in the upper right corner to add a tier.
Click the Add benefit button to set up rewards for customers while in a tier.
When ready with the configuration, click Activate program in the upper right corner.
Adding Tier Benefits
You can offer tier members various VIP benefits to incentivize them to reach and maintain their tier status.
To create benefits:
Click the Add benefit button within the Benefits section.
Select a benefit type and click Next.
Fill in the reward configuration fields in the right-hand panel that appears.
When ready, click Save.
Repeat the process to create other benefits.
Configuring Benefits
There are several types of benefits you can add to your tiers:
Points multiplier
Free shipping
Birthday reward
Anniversary reward
Important
Birthday and anniversary rewards set within a loyalty tier will always override any existing birthday or anniversary reward earning rules.
For example, if you have a birthday earning rule that gives a $20 reward and a loyalty tier offers a $30 birthday reward, customers in that tier will receive the $30 reward instead. However, if a tier has No reward selected, customers in that tier will still receive the reward from the earning rule.
The same logic applies to anniversary rewards. Anniversary loyalty tier rewards take priority when defined.
If no general earning rule is configured, you’ll need to display the tier-specific reward as a tile on the Rewards Page to allow customers to submit their birthday or anniversary date.
Points multiplier
Offer tier members more points for purchases by adding a multiplier to selected eligible earning rules:
Add a positive number as the multiplier (e.g., 2, 1.5).
Select applicable Points for Purchase earning rules.
Free shipping
Offer free shipping instead of customers paying pre-set shipping rates:
Click the respective rate you want to offer for free. Optionally, you can set a minimum spend amount that will only grant free shipping if the customer reaches that minimum order amount.
You can edit the list of shipping rates and zones in your Shopify admin (Settings > Shipping and delivery).
Birthday reward
Reward customers on their birthday.
Select the reward type:
Points
Discount: Choose between a fixed amount or a percentage reward. Use the Discount settings menu to further customize the discount (e.g., applicability, expiration, etc.).
No reward
Customize the rewards history text:
Reward text (only editable for discount rewards): If you remove the dynamic {{reward}} placeholder, the system will not automatically display the reward value and you’ll have to enter it manually.
Action text: This is what customers will see as the name of the reward.
Enable/disable fraud prevention: Enabled by default. If a customer enters a birthday that is within the next 30 days of the tier entry date, the reward will be delayed to minimize abuse of the program.
To change when the birthday reward is triggered, use the universal birthday reward settings by clicking Edit at the bottom of the configuration window.
Anniversary reward
Offer a special reward for the anniversary of your customers’ account creation date.
Choose anniversary occasion:
Account creation anniversary: Reward customers based on the date they created their store account.
Personalized anniversary: Allow customers to enter their own anniversary/special occasion date.
Select the reward type: Points, discount (fixed amount or percentage), or no reward.
Customize the rewards history text:
Reward text (only editable for discount rewards): If you remove the dynamic {{reward}} placeholder, the system will not automatically display the reward value and you’ll have to enter it manually.
Action text: This is what customers will see as the name of the reward.
Add/remove fraud prevention: Enabled by default. If an anniversary date is within 30 days of the customer entering the tier, the reward will be delayed to minimize abuse.
Activating the Loyalty Tiers Program
After you’re done setting up your Loyalty Tiers program, it’s time to activate it.
To activate the program:
Click the Activate program button in the upper right corner.
Select a Tier placement method to determine how customers are assigned to tiers.
.gif)
Tier Placement Methods
Retroactive
Use this option to assign tiers based on past customer activity. The system will calculate tier eligibility using a lookback window starting from a selected start date up to the activation date.
Default lookback period: 12 months before the activation date. For example, if today is August 1, 2025, the calculation will start from August 1, 2024.
Custom range: Alternatively, you can choose a different retroactive start date using the date picker.
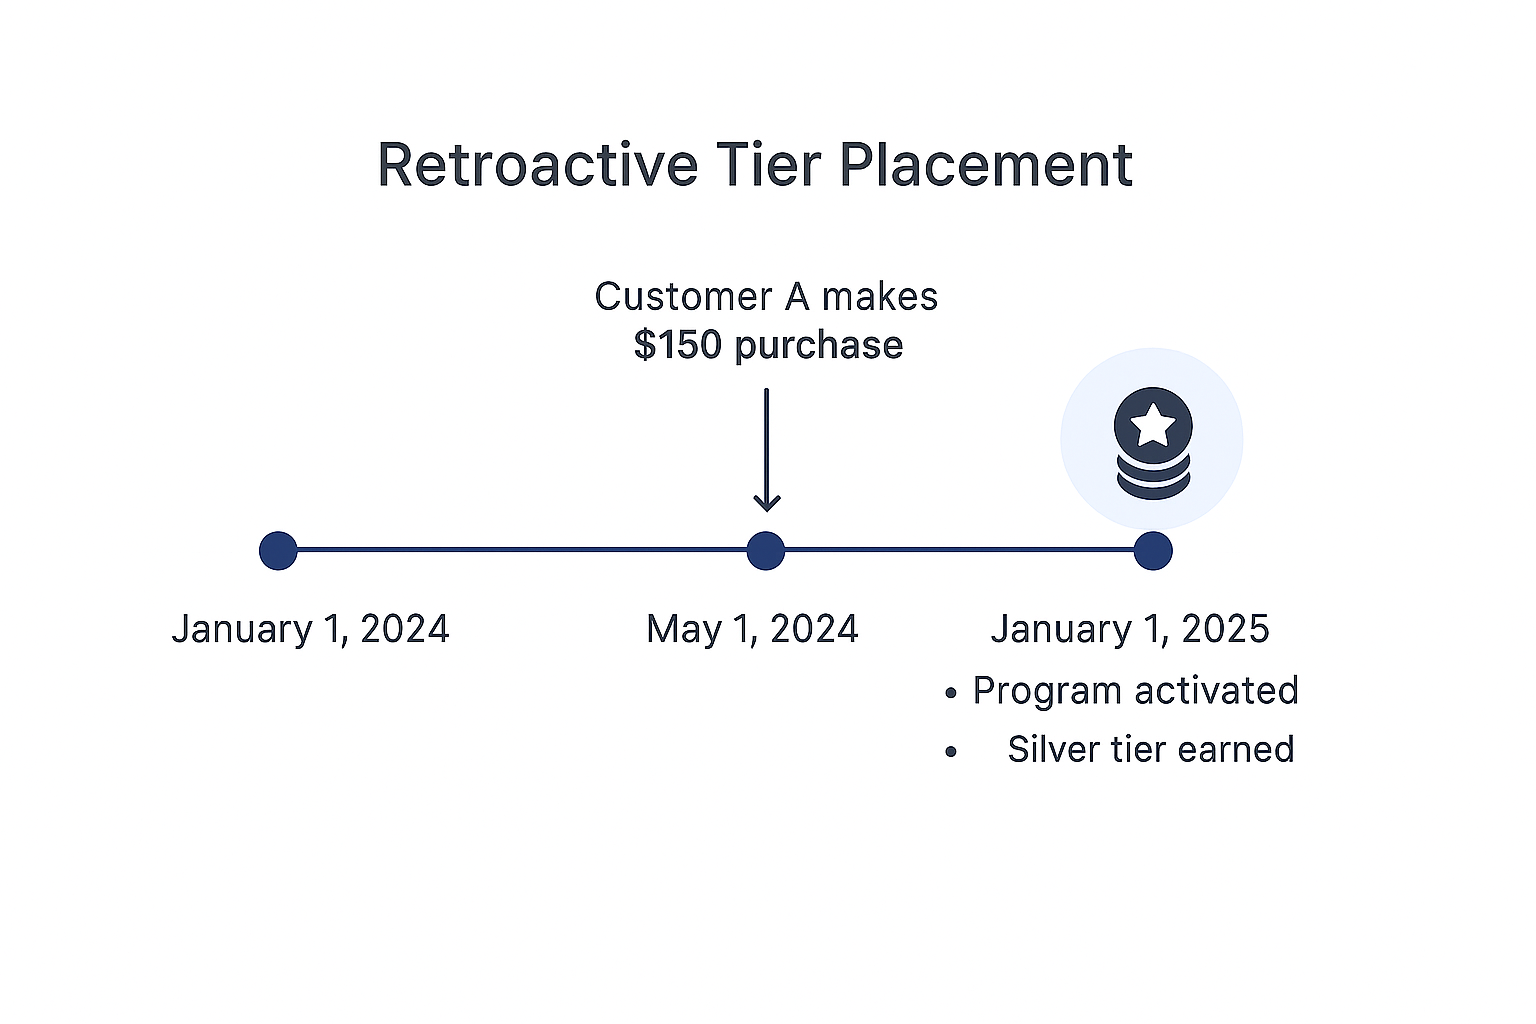
Example: Retroactive Placement
Let’s illustrate how retroactive tier placement works with an example:
Tier term = 12 months
Program activation date = January 1, 2025
Tier placement start date = January 1, 2024
Program configuration = Base Tier, Silver ($100 entry threshold), and Gold ($200 entry threshold)
Customer A makes a $150 purchase on May 1, 2024.
When the program is activated on January 1, 2025, and retroactive tier placement is set to 12 months back, the system reviews activity starting from January 1, 2024.
Based on their purchase, Customer A meets the threshold for the Silver tier and is placed in that tier from January 1, 2025, through December 31, 2025 (based on the 12-month tier term).
Fresh start
All customers start in the Base Tier (or with no tier if a base tier isn’t configured) and move up organically based on future purchases or engagement activity after the program is activated. Past actions are not considered.
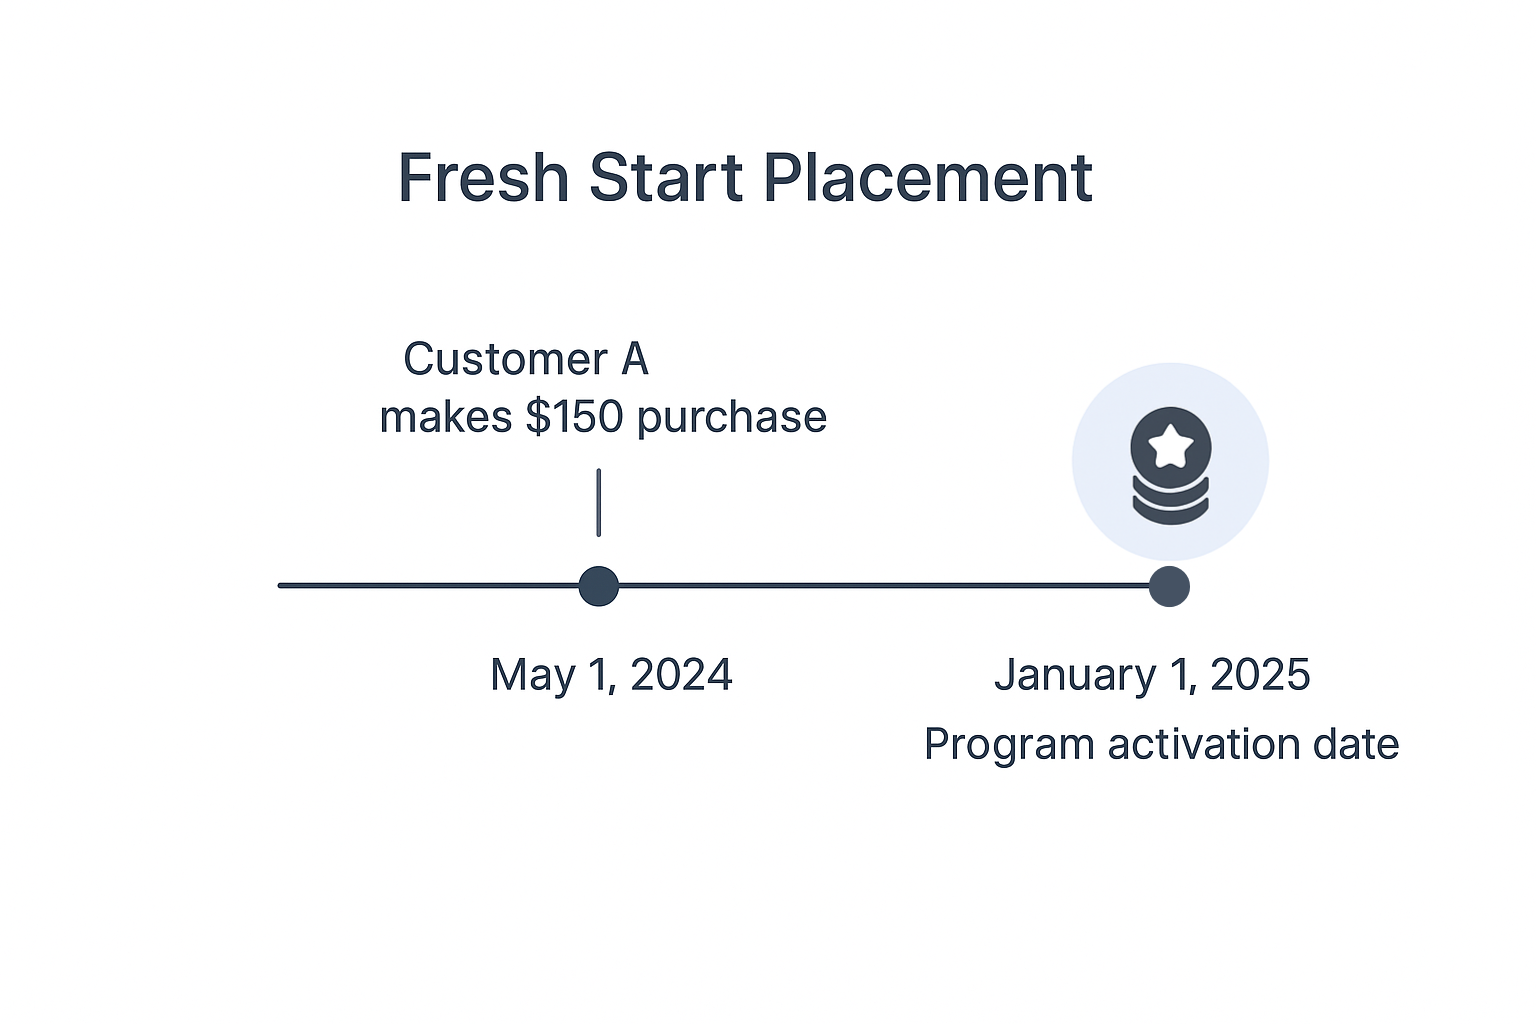
Example: Fresh Start Placement
Here’s an example of how fresh start tier placement works:
Tier term = 12 months
Program activation date = January 1, 2025
Tier placement start date = Program activation date
Program configuration = Base Tier, Silver ($100 entry threshold), and Gold ($200 entry threshold)
Customer A makes a $150 purchase on May 1, 2024.
The program is activated on January 1, 2025, with tier placement beginning on that date.
Since the customer’s purchase occurred before the activation date, it is not counted. As a result, Customer A begins in the Base Tier on January 1, 2025, and will move up only based on future activity.
What Happens After Activation
After you confirm the tier placement method:
All customers are assigned to tiers based on your selected placement method and program setup.
Tier expiration dates are calculated from the activation date based on the tier term.
For example, if the activation date is August 1, 2025, and the tier term is 12 months, shoppers’ tier expiration will be August 1, 2026.
Tier status and related attributes are synced to your ESP. This process can take up to 24 hours.
A customer tag is added to each profile in your eCommerce platform to indicate their current tier in the following format: yotpo-tiers-{tier_name}. This process can take up to 24 hours.
.png)
Important
Your Yotpo Loyalty & Referrals admin (Settings > General Settings > Account) must be activated before you activate the Loyalty Tiers program.
Wait for the recalculation to complete before re-accessing the program settings.
Tier entry rewards are not awarded during activation.
You can track the performance of your program in the Loyalty Tiers Performance Dashboard.
How to Edit an Active Loyalty Tiers Program
Editing Tiers
Once created, tiers cannot be edited while your program is active. To modify tiers, you first need to deactivate your program:
In the upper left corner of the Loyalty Tiers Program page, click the Active button.
Select Deactivate program from the dropdown.
Confirm the action by typing “deactivate” in the popup that appears.
Important
When you deactivate the program:
All shoppers will be removed from tiers and revert to “no tier” status.
All tier benefits will be disabled.
All customer tags will be removed in Shopify.
If you reactivate the program, it will go through the regular activation process. This includes a full recalculation of each customer’s tier placement based on your program rules and settings. Jump to program activation.
Edit the tier configuration to your preference.
When ready, click Activate program in the upper right corner to relaunch your updated Loyalty Tiers program.
Note
While the program is deactivated, you can also update entry rewards and benefits. However, this is not required, since entry rewards and benefits can be updated at any time while the program is active.
Editing Benefits and Entry Rewards
Unlike tiers, you can update program benefits and entry rewards while your program is active. This includes:
Changing benefit and entry reward values
Adding new benefits
Deleting existing benefits
To update benefits and entry rewards:
Navigate to the Loyalty Tiers program setup.
To change a value, click the respective field and update it.
To add a new benefit, click Add benefit.
To delete a benefit, click the three-dot menu and select Delete benefit.
To complete the process, you’ll be asked to confirm you understand that you’re making changes to a live program by checking a confirmation box.
Important
Changes you make will apply immediately.
Benefits and entry rewards are not retroactive. For example, if you add a 50-point entry reward while the program is active, only customers who qualify for that tier after the change will receive the reward.
Was this article helpful?