- DarkLight
Creating a Subscriber Collection Popup
- DarkLight
Goals and Outcomes
Creating a subscriber collection popup empowers you to grow your audience seamlessly while fostering engagement through SMS and email marketing. With this feature, you can capture visitors’ contact details directly from your website, providing an excellent opportunity to build relationships and enhance your brand’s reach.
By setting up this feature, you can:
Increase subscriber acquisition with visually engaging and customizable popups.
Stay compliant with regulations while gathering user consent for communication.
Utilize collected data to personalize your marketing strategies and maximize conversion rates.
With these capabilities, you’ll enhance your ability to drive meaningful interactions and revenue growth through SMS and email campaigns.
Subscriber Collection Popup Overview
The Subscriber Collection Popup feature gives you the tools to effortlessly capture visitor information and expand your subscriber base. With customizable options, you can design popups that align with your brand’s identity, ensuring they resonate with your audience.
This feature allows you to:
Collect SMS and email subscribers directly from your website.
Customize popup content, layout, and style to reflect your brand.
Use pre-built templates or create designs from scratch to match your marketing goals.
Optimize your collection strategy with actionable insights into performance metrics.
By leveraging the Subscriber Collection Popup, you can effectively enhance your marketing reach and drive conversions while creating a seamless experience for your visitors.
Creating a Subscriber Collection Popup
Locating your popups
You can quickly customize your popups to match your brand by choosing from a variety of pre-designed templates.
To get started:
Open the Yotpo SMS & Email main menu and navigate to Audience > Subscriber Collection Tools.
Find the Popup card and click Set it up.
Explore the Popup Templates page, where you can sort templates by SMS & Email, SMS, or Email.
Select a template to access the editor and begin customizing, or click
Create from scratch to design your popup from the ground up.
This intuitive process helps you create stunning, brand-aligned popups effortlessly.
.gif)
Customizing Your Popup
The popup editor makes customization simple and intuitive for you. After selecting a template, just click on any element to see its properties appear on the left side of the screen. From there, you can effortlessly adjust colors, fonts, and outlines and even add an image to create a popup that perfectly matches your brand.
Layout settings
Navigate to the left-side menu of the popup editor to access the Layout Settings.
Here, you can customize key elements of your popup, including colors, fonts, background images, corners, and outlines, to create a design that aligns with your brand.
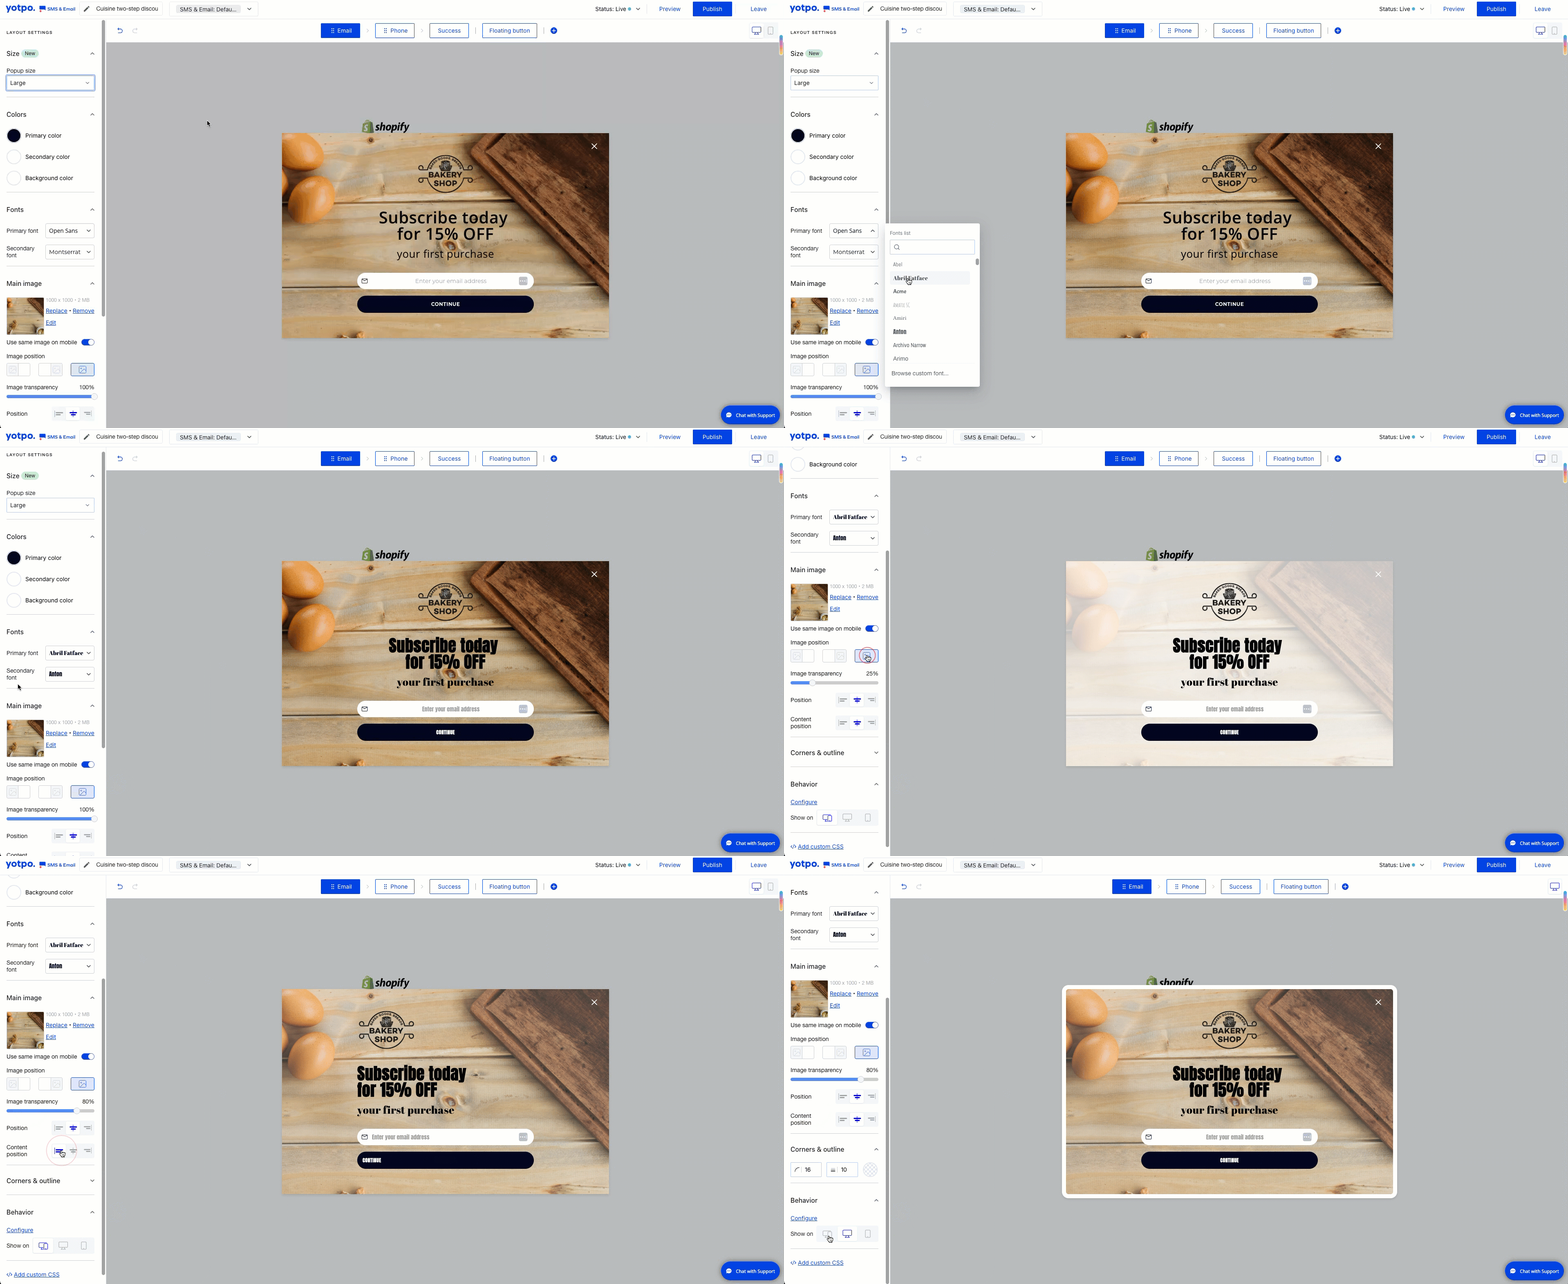
Adjusting popup size
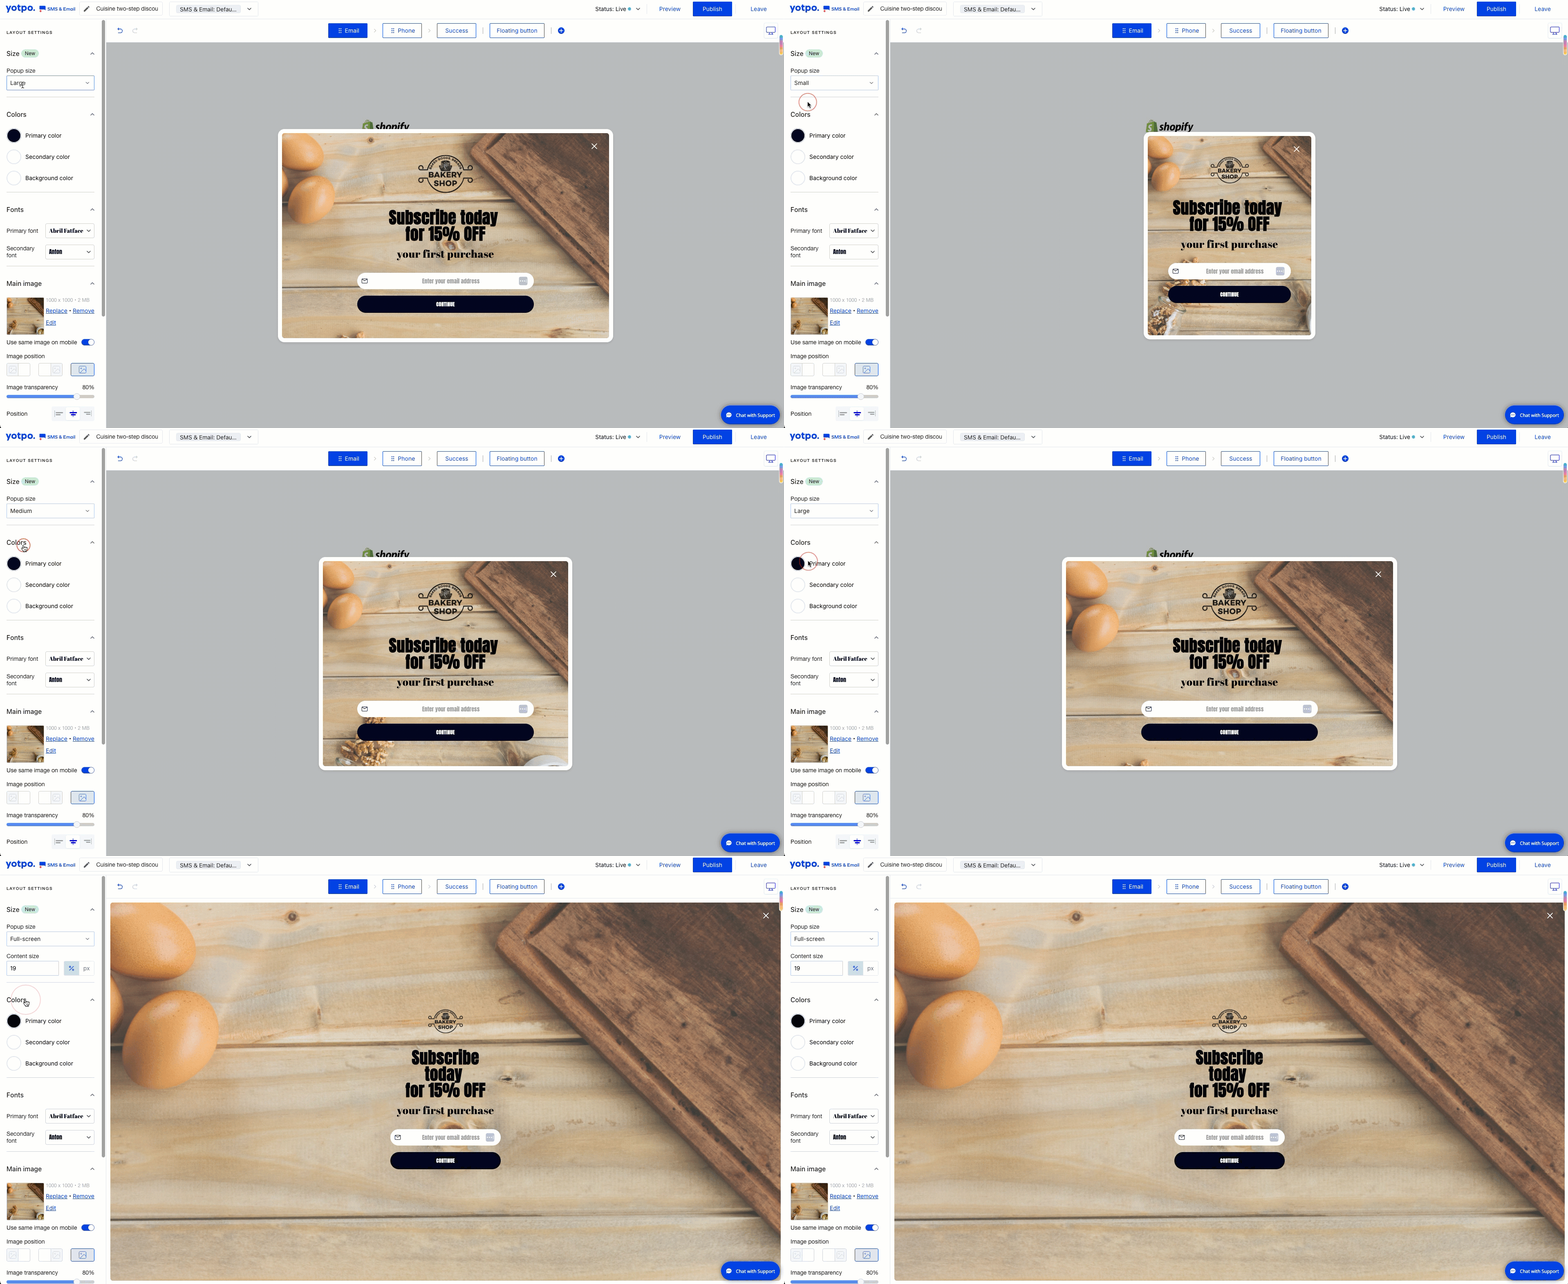
You can also adjust the size of your popup from the Layout Settings menu. Follow these steps:
In the Layout Settings menu, locate the Popup Size drop-down.
Click the drop-down to view the available size options:
Small (400px wide) – Compact and ideal for minimal content.
Medium (600px wide) – A balanced option for more content while keeping a clean design.
Large (800px wide) – Ample space for visuals and detailed messages.
Full-screen – Covers the entire screen, drawing maximum attention to your content.
Select your preferred size. The preview will update automatically, allowing you to see how the content adjusts to fit the new width.
Important
The width setting adjusts the overall size of the popup, but the height remains dynamic, adapting to the content length.
Content such as text, images, and buttons will adjust automatically to maintain alignment and structure based on the selected size.
For full-screen popups, you can further adjust the content area size to Small, Medium, or Large, controlling how much space the content occupies relative to the entire screen.
Behaviors
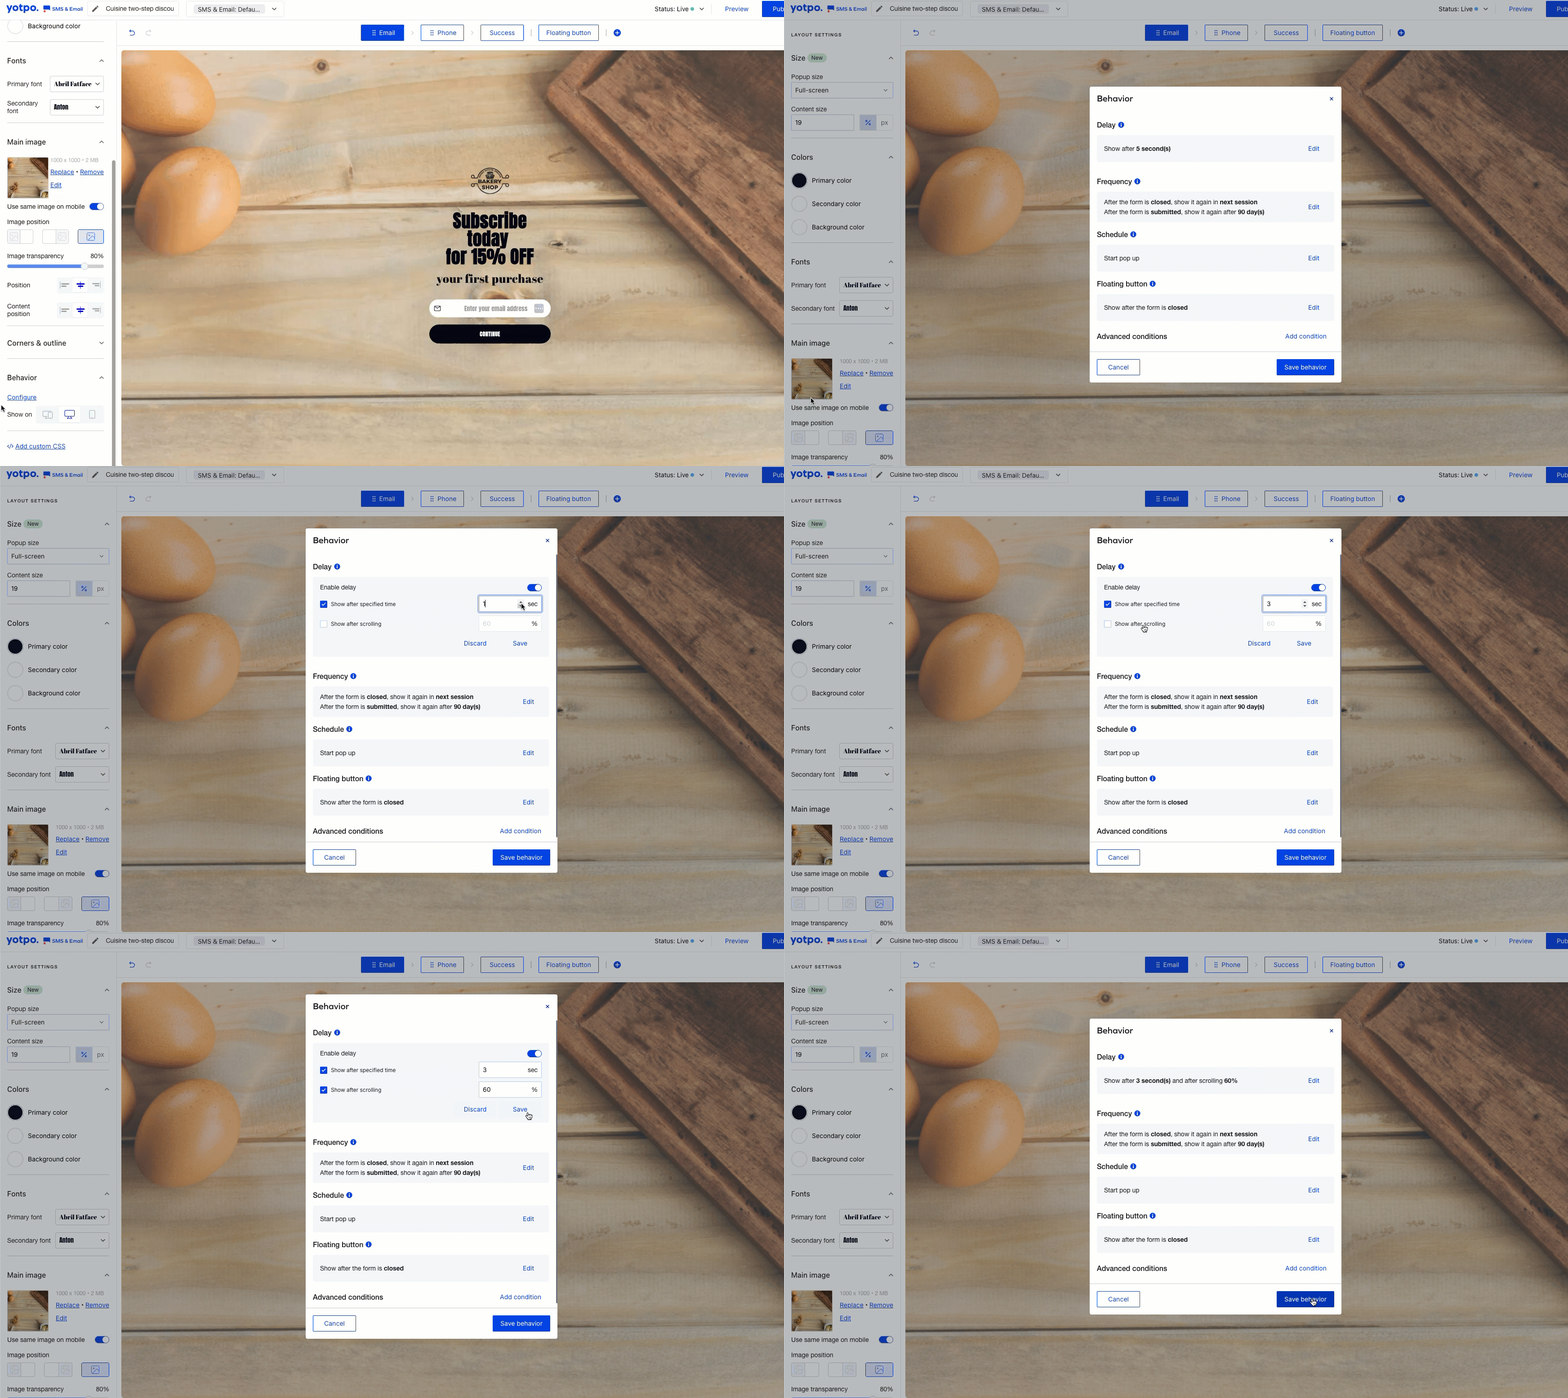
Navigate to the Behaviors section to adjust the settings for your popup, such as display timing, targeted URLs, and exit intent detection. For more details, check out our article, Defining the Behavior of Your Popup.
Add custom CSS
For advanced customization, you can apply your own CSS using the Add Custom CSS feature located at the bottom of the Layout Settings menu.
.gif)
For more details, check out our article, Defining the Behavior of Your Popup.
You can also your own CSS from the Add Custom CSS feature located at the bottom of the Layout Settings.
Popup elements
You can quickly rearrange your popup elements—such as the title, subtitle, and button—by dragging and dropping them. To add new elements, click the plus icon between sections. Customize any element by clicking on it directly in the popup editor.
Easily customize each step of your popup, including its mobile design, using the navigation bar at the top. You can also reorder steps with drag-and-drop functionality—just click, hold, and drag the step to your desired position for added flexibility.
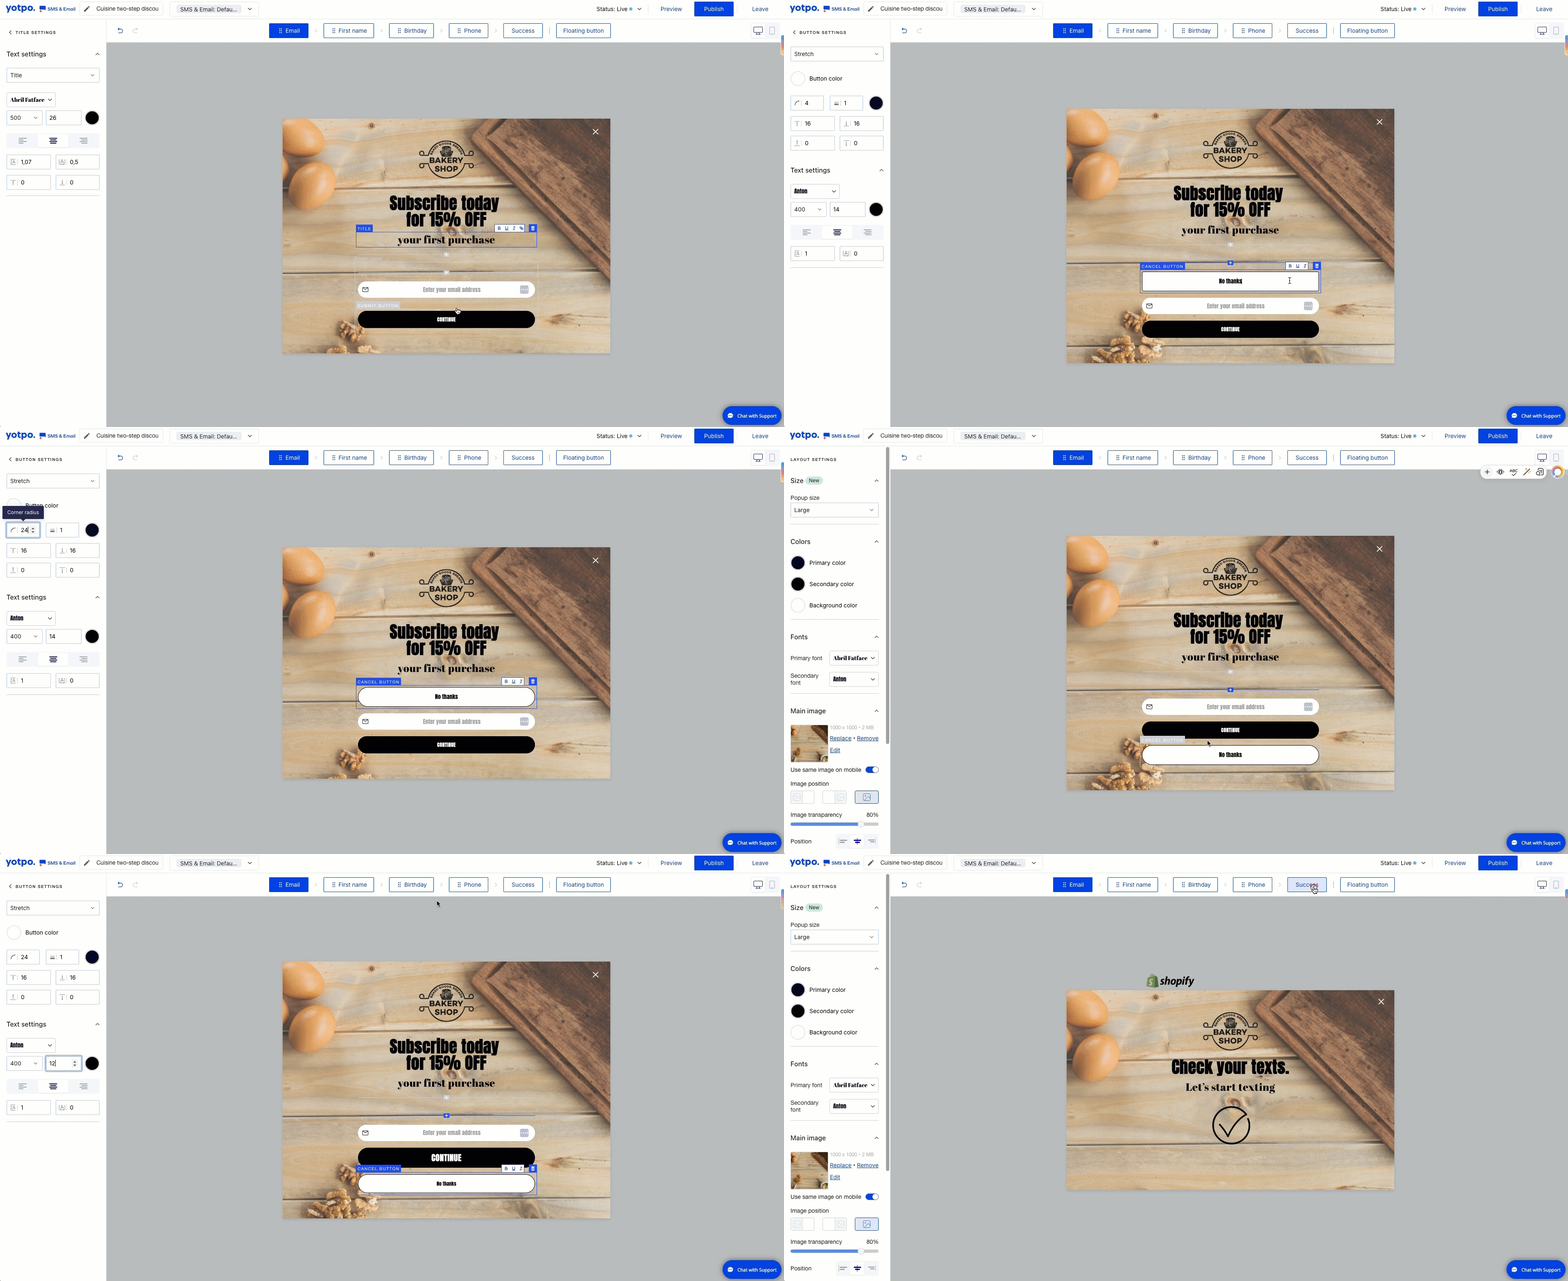
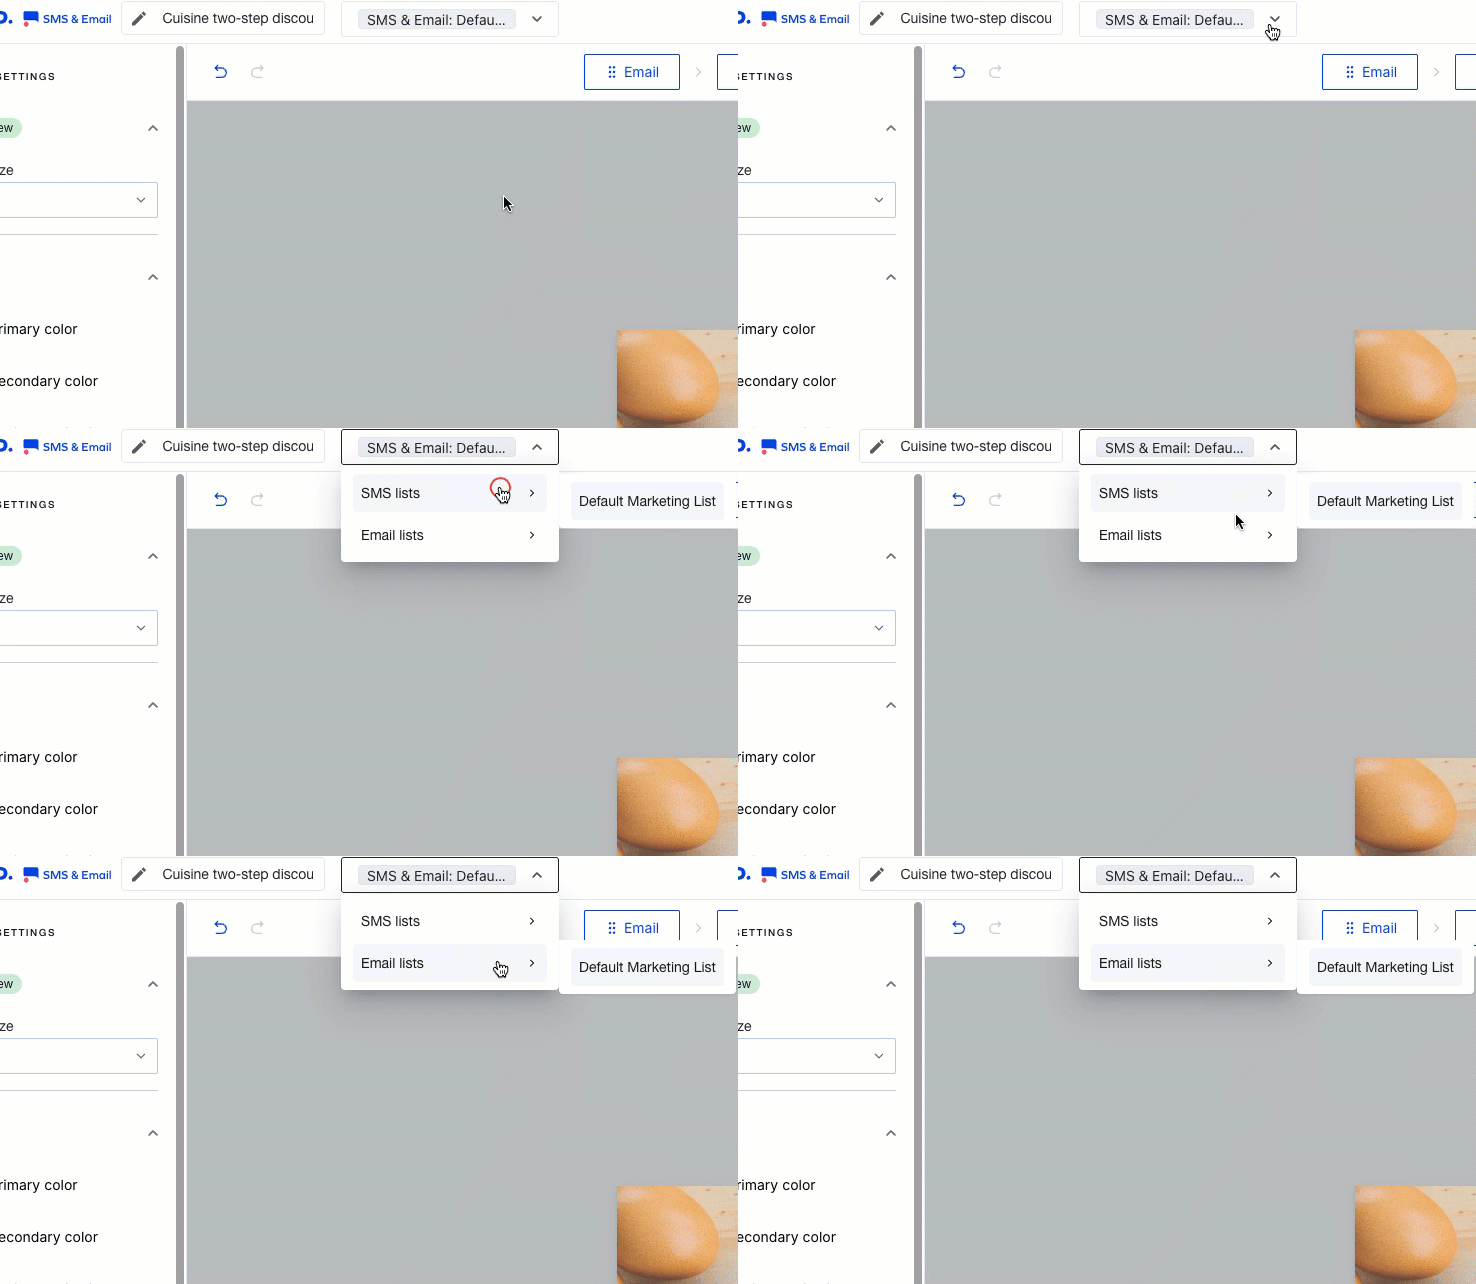
To organize your subscribers, use the Selected List drop-down menu to choose where new signups are added.
Adding compliance text and disclaimers
Including a Compliance Text is required for every popup to ensure legally approved messaging is present before you can proceed. The disclaimer is optional but can be added for additional information or transparency.
To add compliance text and/or a disclaimer:
Click the plus icon just before the last popup element.
Select Compliance Text or Disclaimer from the menu.
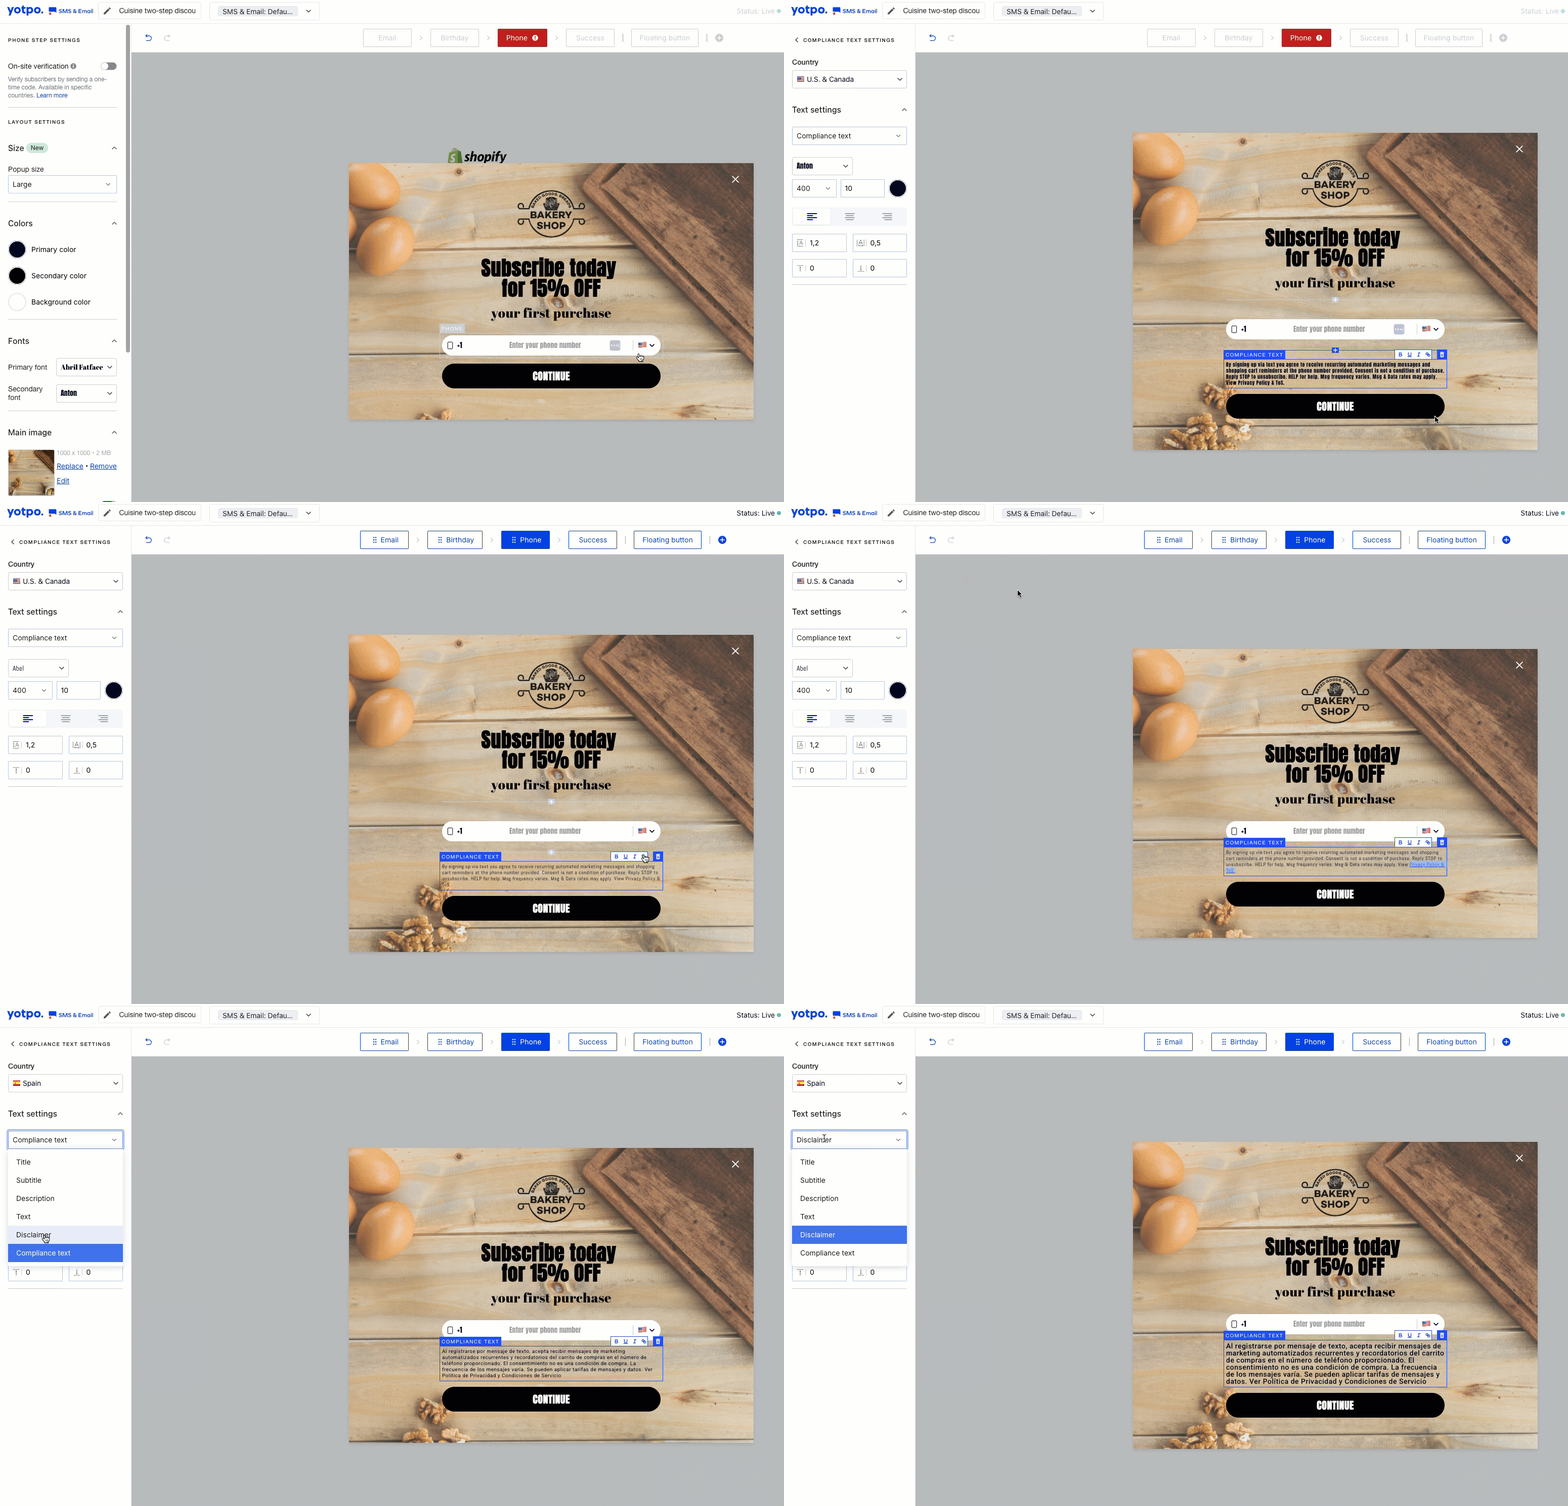
Compliance text (required):
Displays legally approved text based on the selected country.
Ensures your messaging aligns with regulatory standards for collecting subscriber information.
If you’re using a pre-designed template, the compliance text is already included. You only need to edit it and link to your Privacy Policy and Terms of Service.
If you’re creating a popup from scratch, a warning message will appear in the editor until the compliance text is added.
You can only add one compliance text per step. If one is already present, the option to add another will be disabled.
.png)
Disclaimer (optional):
Free-text area to provide additional information to subscribers, such as promotional limits, privacy assurances, or shipping restrictions.
You can add a checkbox and set it as required to ensure users acknowledge the content before proceeding.
Only one disclaimer can be added per step. If a disclaimer is already present, the option to add another will be disabled.
Important
When editing your compliance text, select the country to which the settings apply.
Ensure that your compliance text includes a link to your Privacy Policy and Terms of Service to maintain legal compliance.
If a compliance text or disclaimer is already included in the current step, the add option will be disabled to prevent duplicates.
.png)
Important
We strongly recommend consulting a legal representative before making changes to the compliance text, as modifying it without guidance may result in non-compliance.
Floating button
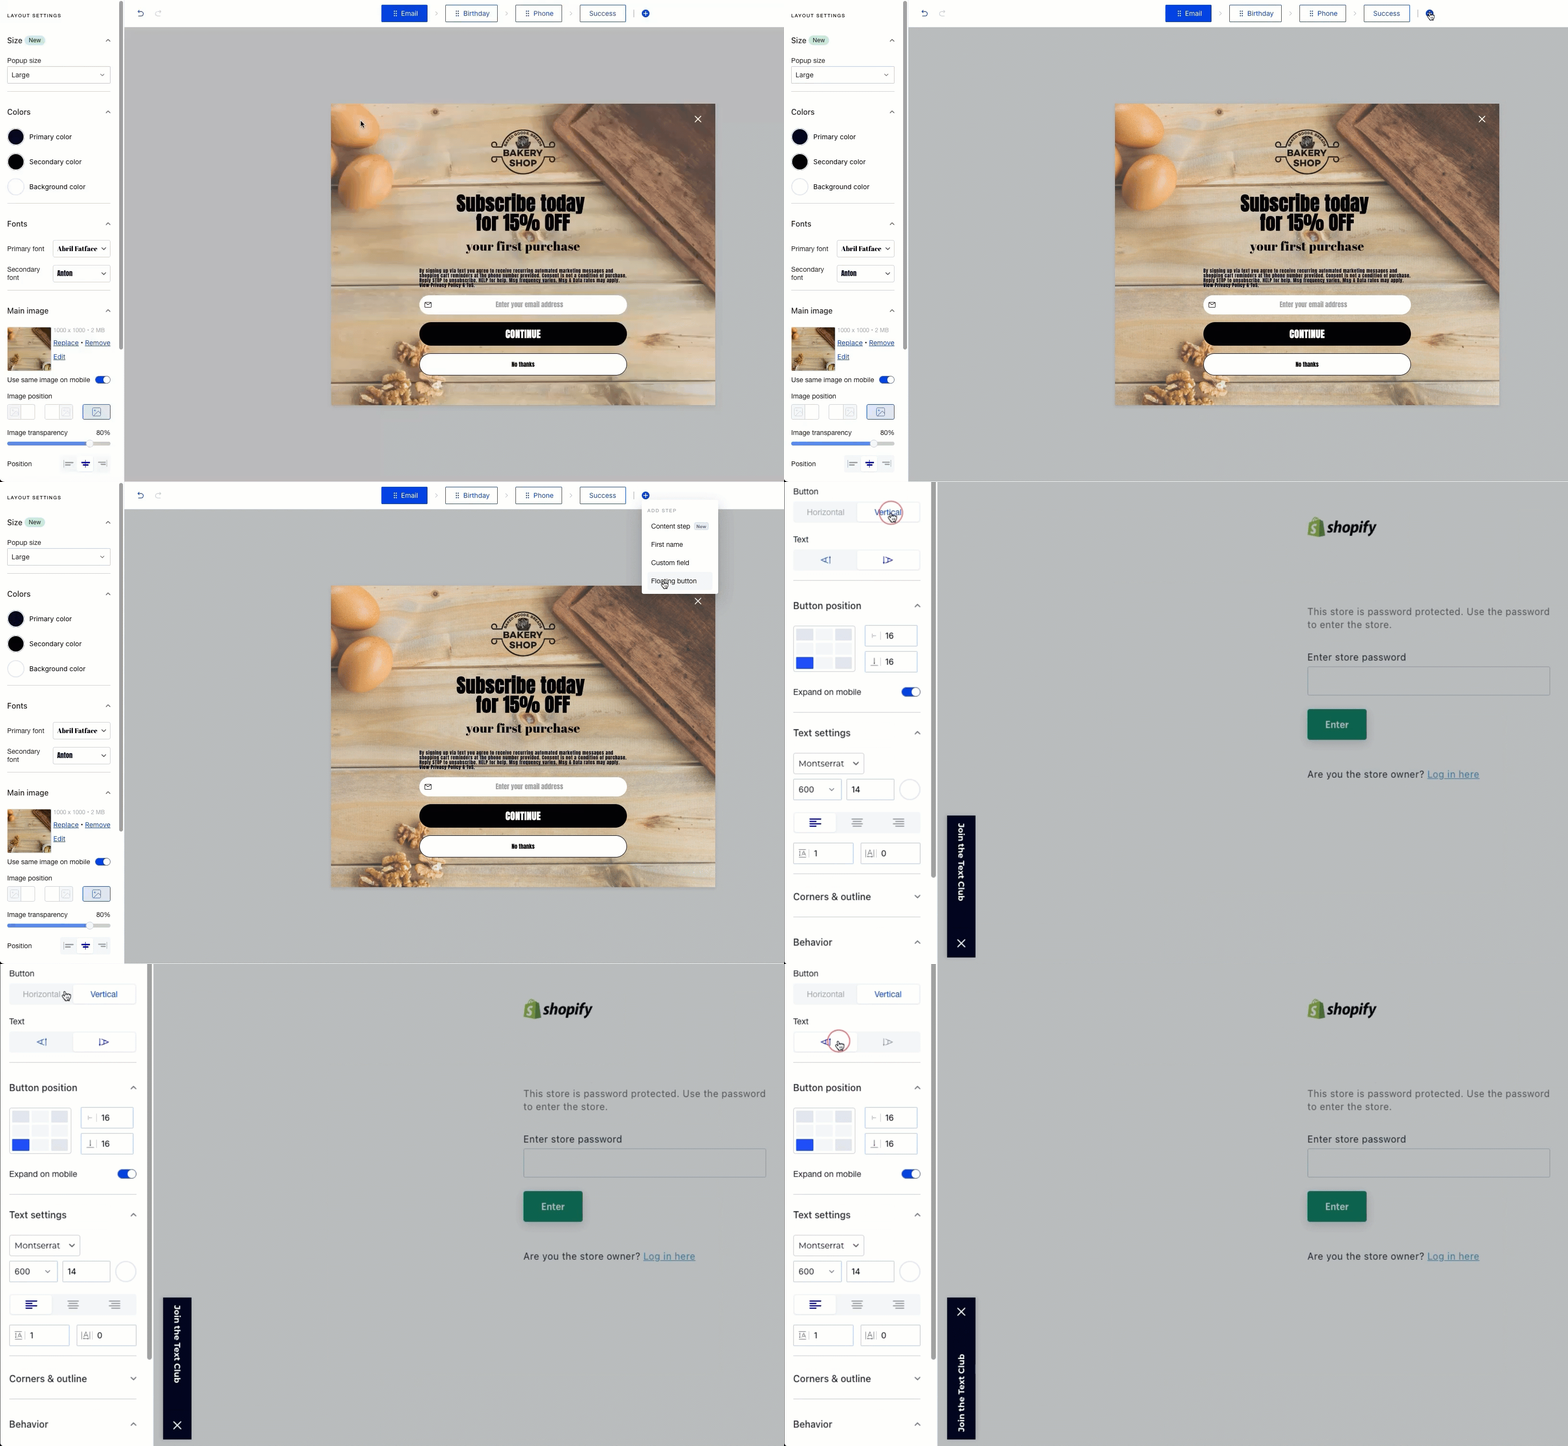
To add a floating button, click the plus sign in the Popup Elements menu. This button appears at the bottom-left corner of your customer’s screen after they close the popup, letting them return to the form later. Customize the floating button just like any other element by clicking on it.
Publishing and Editing Your Welcome Flow
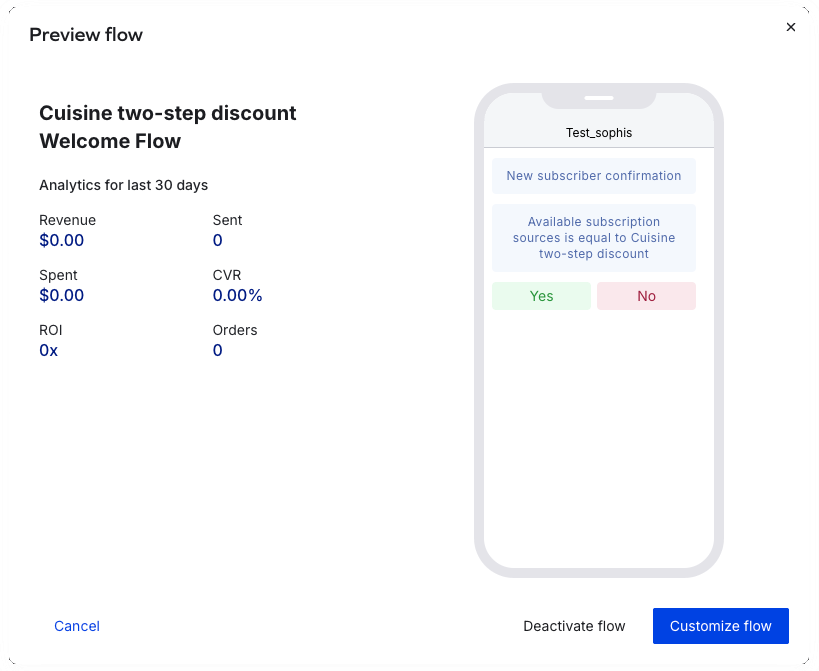
When you’re ready, click Publish. A success popup will appear - click See Flow to preview it.

From there, select Customize Flow to open the flow editor and personalize your Welcome flow.
