In-Store Module
- DarkLight
In-Store Module
- DarkLight
Article summary
Did you find this summary helpful?
Thank you for your feedback
Overview
The In-Store Module Manager allows you to quickly build a customized and intuitive user experience for your omnichannel customers.
Before you start
Before going live with your in-store module make sure to complete these three important steps:
- Send Yotpo your offline data.
- Create your in-store redemption options.
- Customize your in-store Loyalty Authentication Link Email.
Throughout this article, we'll navigate you through accessing, customizing, and embedding the In-Store Module on your site.
Accessing the In-Store module
To get started:
- Log in to Yotpo Loyalty & Referrals admin.
- Click on the In-Store Module navigation item under the Omnichannel section of your admin - This will open up the editor in a separate tab in your browser.
- Click on the + New Widget box to begin building your first In-Store Module.
Customizing the In-Store module
General Settings - Widget Log-In
Use this section of your widget editor to define the Landing Page URL of your In-Store Widget. Please insert here the URL of where your In-Store widget will be implemented, and is used as the link in the 'In-Store Loyalty Authentication Link (Customer)' Email.
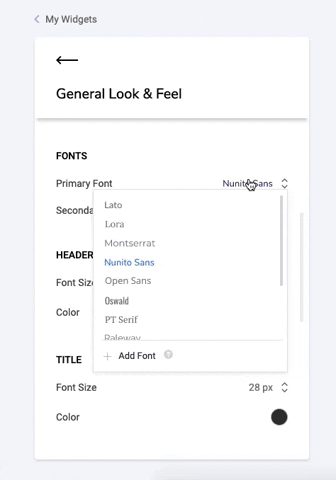
General Settings - Design
In this section, you'll be able to edit several different aesthetic elements of your In-Store Widget. Some of the customization options available are:
- Background Image
- We recommend 1920 x 1080 image dimensions and compress your image to optimize load speed
- Fonts
- Customize the font styles & weights of your main and secondary fonts in your widget
- Add Your Own Font - our widget editor supports adding your own custom font to render onto the preview in the editor
- Colors
- Select the main and secondary colors of your in-store widget
- Other
- Choose from several different button styles
- Advanced
- If you'd like to make further customizations to the widget, use our embedded CSS editor.
- If you'd like to make any overriding changes to the referral widget CSS, use this class name before the class you want to override:
.yotpo-offline-redemptions-widget.yotpo-widget-override-css {
}Please make sure to use our embedded CSS editor instead of hardcoding directly onto your storefront.
This allows our development team to recognize if any changes we push in the back end will affect the front end of your widget.
We will not update a specific widget instance if we detect that it will impact your live widget version. Our team can only detect these issues if the CSS is in our editor.
Screen preferences
In this section, you'll be able to customize the Text on each screen of your in-store widget. Simply, select the screen from the dropdown, as seen below, to begin editing the content for that specific screen.
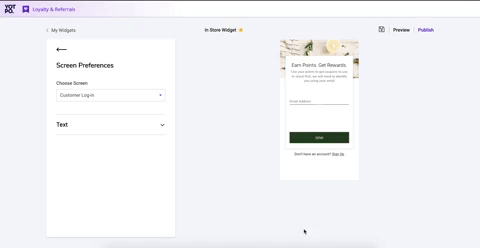
Customer login
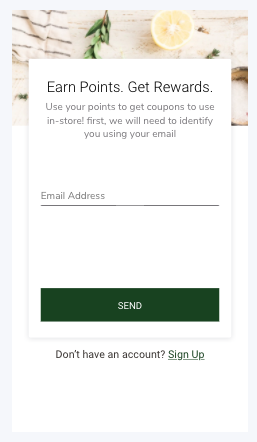
This is the first screen of your In-Store widget and the first screen your customers will see when they land on your widget. On this screen, customers will log in to their loyalty account or sign up for a loyalty account if they do not have one already!
Login flow
If a customer has an account with your store, they will:
- Enter their email address in the "email address" field.
- Receive a "We Sent You An Email" verification message.
- Receive the In-Store Loyalty Authentication Link email to log into their widget.
- Click the link in their email to be taken to the My Profile screen.
Signup flow
If a customer does not have an account with your store they can click the "sign up" button at the bottom of your widget to get redirected to your online store & create an account on your platform.
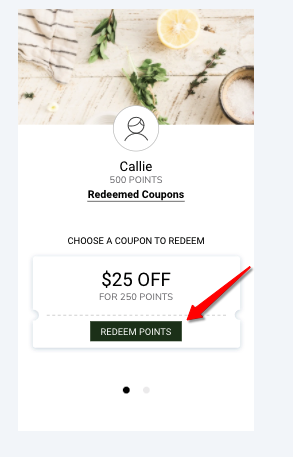
My profile
This is the screen your customers will see after they click the authentication link sent to their emails. Here they are logged in to their loyalty program and can access their points balance, redemption options, and past redemptions.
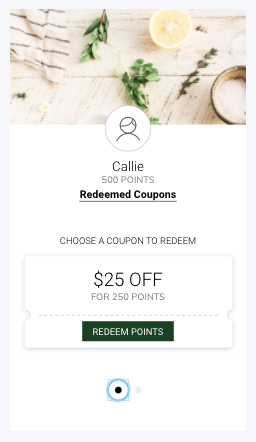
Customization options include:
- User Icon - use our default icon or upload your own icon
- Headline - by default, this message will be "Choose A Coupon To Redeem"
- Coupon - by default, we will present a $25 and $50 off coupon to properly showcase the carousel and how the coupons would look.
Once deployed, the widget will only pull the In-Store rewards you created in the Redeeming Points section of your Yotpo admin. The name of the coupon ("$25 Off") also pulls from the name of that In-Store coupon- Points Deduction - by default, this message will be "FOR {{cost_in_points}} POINTS". If you'd like to change this message, be sure to use the {{cost_in_points}} variable to pull in this value from the In-Store coupon itself (pulls from How many points does this coupon cost? )
- Button - by default, this message will be "Redeem Points"
Redemption completed
Once a customer selects a redemption from the carousel and redeems their points, they'll be presented with our Redemption Completed modal that contains their coupon code. This code should be presented to the store clerk so that they can key in the discount to the active purchase.
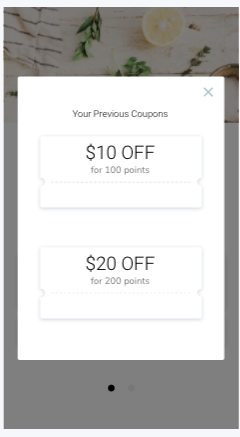
My redemptions
The last screen available for customization is your customer's My Redemptions screen, where a customer can view their past unused coupons and, if enabled, return the coupon to get their points back.
Enable Redemption Reversal
If you'd like to allow your customers to return their coupons to receive their points back, then toggle this setting on.
To support this feature, your team will have to perform some additional development work outlined here.
Advanced customizations
If you would like to change the button text for a specific redemption, you can use a div attribute to do so.
Applying the div attribute
To change the text of the button, you need to add the following attribute to your module's code snippet, just after your instance ID.
Attribute: redemptions-{REDEMPTION OPTION ID}-content-redeem-button-text="BUTTON TEXT"

For example, if your module's code snippet looks like this:<div class="yotpo-widget-instance" data-yotpo-instance-id="0000"></div>
Then add the attribute here:
<div class="yotpo-widget-instance" data-yotpo-instance-id="0000" redemptions-{REDEMPTION OPTION ID}-content-redeem-button-text="BUTTON TEXT"> </div>
How to find the redemption option ID
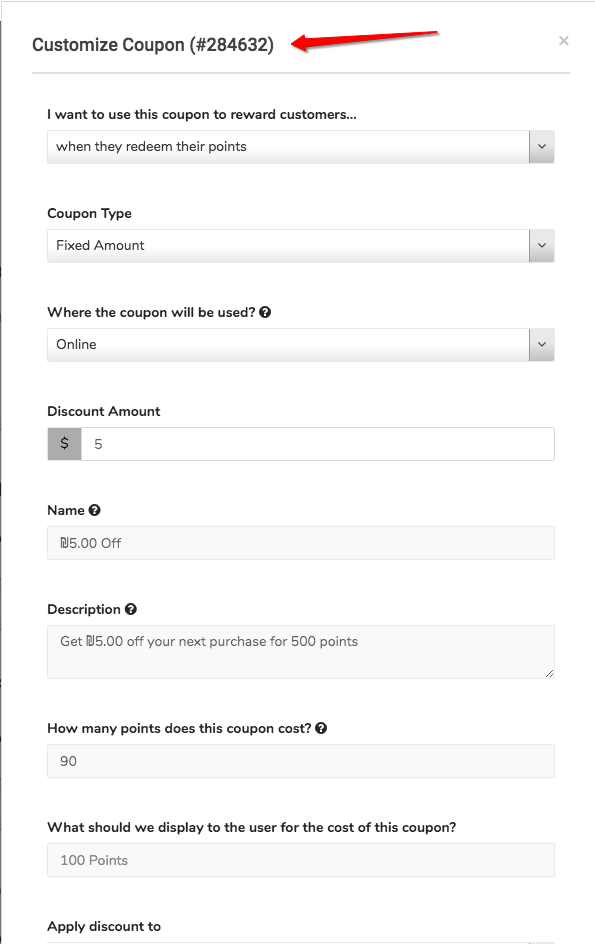
In order to find the redemption option ID, you need to go to the rewards section on the loyalty admin. Click the coupon that you would like to change the button text for. Click on that coupon, the redemption ID will appear in the title.
Deploying the In-Store module
Before deploying your in-store widget make sure to complete these three important steps:
- Send Yotpo your offline data.
- Create your in-store redemption options.
- Customize your In-Store Loyalty Authentication Link Email.
- If you use Yotpo Triggered Emails, use this guide to help.
- If you use one of our Email Marketing Integrations, select the guide relevant to you by clicking here.
Once you're done customizing your widget it's time to add it to your storefront.
Step 1: Create a blank page on your online store
The first thing you'll need to do is create a new completely blank (no styling/formatting) page on your online store that is not linked to any navigation. This is the page that you will embed your In-Store widget on. The URL of this page is also the URL you will input into your Landing Page URL field.
Step 2: Publish
Next, we'll want to embed the widget onto the blank page you just created on your storefront.
Click the Publish button in the top-right corner of your instance editor.
- The first snippet you see (1), only needs to be added to your store on the page you want to load your widget on - This script will load any and all widgets you create. You can also add this snippet to the header of your layout so it loads on all pages of your store.
- The second snippet of code (2), pertains specifically to the widget you just customized - You only need to add this snippet of code the first time you embed this widget.
Any customizations you save and publish on this widget moving forward will not need another copy and paste of the code
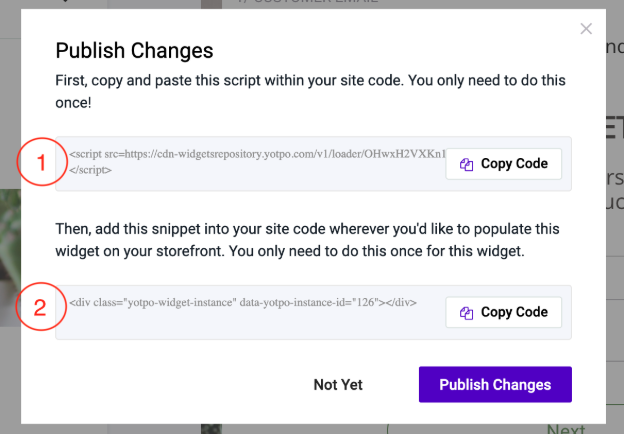
When you're ready, click Publish Changes to activate your widget.
You can also activate your widget from the Widgets Home screen: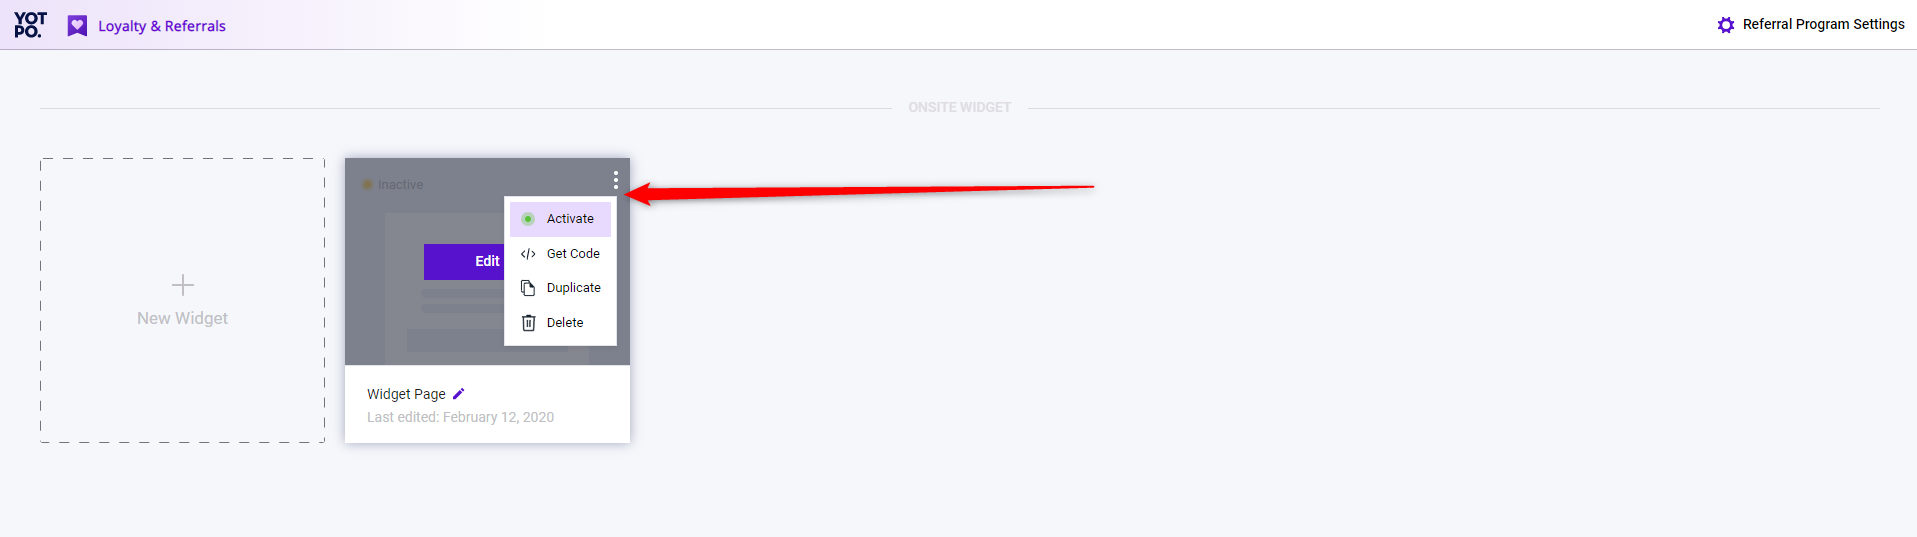
Active
If your widget is active (green dot), this means that any changes you publish will be reflected on your store if the widget snippet is embedded
Inactive
If your widget is inactive(yellow dot), this means that any changes you publish/save will not be reflected on your store. This also means if you had the widget snippet embedded and active on your store before, it will not be visible when inactive.
Step 3: Marketing your Omnichannel Loyalty Program
Now that your widget is active & embedded in your online store, we recommend following some of the suggestions below so that your offline customers are aware of and engaged with your In-Store loyalty program.
Create In-Store Collateral with QR Codes
Use a QR Code Generator and convert your Landing Page URL into a QR code to embed on posters, pamphlets, and other marketing materials in-store to promote your loyalty program.
By using a QR Code, all your customers need to do is point their mobile device's camera at the code to land on your In-Store Widget, saving them the hassle of opening a browser and keying in the URL letter-by-letter.
Our most successful brands have these QR Codes placed throughout the store & at the checkout counter so customers have a chance to engage either while shopping or only when they're ready to complete their purchase and redeem their points!
Notify Your Customers
Send an email blast or send an SMS to your subscribers to share the launch of your Omnichannel Loyalty Program! Customers love to hear that they can now earn and use their points interchangeably between your online and brick & mortar stores.
Was this article helpful?