Managing Email Fonts
- DarkLight
Managing Email Fonts
- DarkLight
Article summary
Did you find this summary helpful?
Thank you for your feedback
Email Fonts Overview
Our Brand kit offers a number of standard and non-standard fonts for you to use in your emails. In addition, you can add custom fonts to further customize your email designs and align them with your brand.For custom fonts, you can either choose from our selection of Google Fonts, or link to a web font.
In this article, you’ll learn how to add, manage, and delete fonts.
Understanding Font Types
Fonts are a powerful way to make your emails truly yours. When choosing a font, you have access to these options:
Standard fonts: these are web- and email-safe fonts that come pre-loaded on most devices.
Non-standard fonts: these fonts may not be supported by all email clients.
Custom fonts: you can add custom fonts to your library of fonts, either by selecting a Google Font, or by adding a link to a web font hosted on the internet.
Fallback font: You can also select a default safe font to use in cases where the device cannot load a custom font.
Selecting fonts
Define the fonts to use as a part of your brand kit. The selected font will be used in all emails with your brand kit applied.
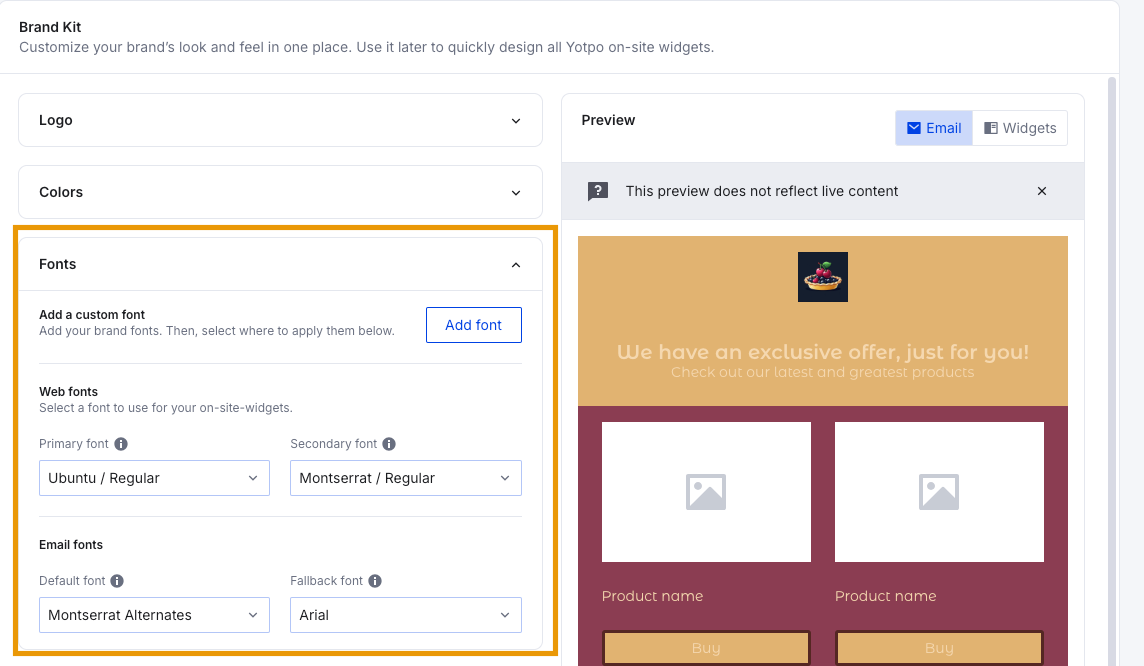
In your Yotpo SMS & Email main menu, go to Settings > Brand Kit.
With the Email tab open, click on the Fonts section.
Choose your Default font from the list of web fonts and custom fonts if you have any.
Select a Fallback font. The fallback font is a web-safe font, supported by most devices. It will be used when an email client cannot load the default font.
Click Save.
Note
After clicking Save, your selected fonts will apply to all new email campaigns and templates using your brand kit. They will not be applied to drafts or existing templates, unless you re-apply your brand kit.
Adding a Custom Font
Note
Some email clients may not support custom fonts. When not supported, your fallback font will be used. If you require a font that the brand kit doesn't include, you can add custom fonts to your library of fonts, and choose one to use in your brand kit.
In your Yotpo SMS & Email main menu, go to Settings > Brand Kit.
With the Email tab open, click on the Fonts section.
Click Add font in the Add a custom font section.
In the popup, you can add your font files and snippets.
Click Next.
Give your font a name and check the box indicating you are allowed to use the font.
Click Add font.
Your font will now be available in your font library.
Note
You can also add a custom font directly from the editor. Open the font dropdown list and scroll to the end. Then click Add custom font.
Updating Custom Fonts
To update the styles of a custom font, add the font again. You will receive a confirmation to replace and update the existing font.
Switching Fonts
Click on the font you want to change.
Select the font you would like to use from your font library.
Click Save to save the brand kit.
Note
Custom fonts uploaded to your brand kit will remain in your font library even if they are not in use.
Was this article helpful?