Moderating Reviews
- DarkLight
Moderating Reviews
- DarkLight
Article summary
Did you find this summary helpful?
Thank you for your feedback
Goals and Outcomes
Reviews and Q&A Moderation is your central user-generated content (UGC) moderation interface. Here you'll find many of Yotpo's powerful moderation tools right at your fingertips. Use the moderation console to select reviews for publication on your site, tag your review content, share reviews through social media channels, comment on reviews to engage customers, and more.
In this article, you'll learn about the actions you can take on your reviews. To learn about viewing and sorting your reviews, see Viewing and Sorting Reviews in Yotpo.
Publishing Reviews
You can save time by automatically publishing all or some of your reviews without any action on your part. To learn more, see Auto-Publishing Reviews.
If you prefer to publish your reviews manually, you can do so individually or in bulk.
To publish an individual review, click Publish under the relevant review.
To publish multiple reviews, mark the check box next to the reviews you'd like to publish or click Select All to select all reviews on the page. Then, click Action > Publish Reviews.
Notes
Newly published or imported reviews may take up to 4 hours to appear on your site.
If you notice that the number of reviews on your site differs from what appears on your Yotpo Moderation page, keep in mind:
The Moderation page displays all reviews in your account, including unpublished, pending, and rejected reviews.
Your onsite review count only includes reviews that have been published and are visible to your customers.
Tagging Reviews
Categorize and organize your reviews for your personal use by manually adding tags. For example, you can add a "top shopper" tag to identify your best shoppers, or a "to review" tag to identify reviews you want to follow up on. You can then filter all reviews with these tags.
These tags are only visible in your Yotpo Reviews account and will not be visible to your customers.
Available for
Reviews Tagging is only available for Yotpo Reviews Pro, Premium, and Enterprise plans.
To add a tag to a single review:
Next to the review you want to tag, click Add tag.
Search your existing tags or create a new tag by typing it into the field.
Click the tag to assign it to the review. You can add as many tags as you like.
Click Done to finish. Tags you assigned to the review will appear next to it.
To manage your tags in bulk:
On the left of the moderation panel, under Tags, click Manage Tags. A popup displays.
Here you can create new tags, edit existing tags, or delete tags.
Click Done to finish.
Escalating Reviews
Escalate reviews that contain content requiring further attention. You can escalate reviews individually or in bulk.
If you’ve integrated Yotpo with your help desk, escalating a review will automatically send an email to the email address you defined as your escalation email. You can update this email address at any time by navigating to Moderation > Help Desk.
To escalate a review:
Under the relevant review, click Escalate.
From the dropdown, select the reason you’re escalating the review.
To escalate multiple reviews:
Mark the check box next to the reviews you'd like to escalate or click Select all to select all reviews on the page.
Click Action > Escalate, and then, from the dropdown, select the reason you are escalating the reviews: Legal transgression, Profanity, Foreign language, Includes personal details, Mention of different products, Mention of pricing, or Other (free text option).
To view all escalated reviews and why they were escalated, click the Escalated status in the Filters area.
Note
An escalated review will not be auto-published, even if it meets your auto-publish criteria. Learn more about auto-publish
Rejecting Reviews
If you don’t want to publish a review on-site, you can instead choose to reject the review. Rejecting a review will remove it from the published or pending lists, unpublish it from your site (where relevant), and change any public comments on the review to a private comment. The customer who left the review will not receive a rejection notification.
Pushing a rejected review to social media or commenting on the review publicly will change the review status from Rejected to Published.
Reasons for rejecting a review
You can reject any review which falls under one of the categories below. If your review does not fit into any of these categories, you should publish it.
Reason | Description |
|---|---|
Legal transgression | The review contains information that cannot legally be published, for example, a person’s financial, medical, or personal file information or a company’s trade secrets. |
Profanity / Inappropriate | The review contains libelous, harassing, abusive, vulgar, obscene, or sexually explicit language, and/or the review is inappropriate concerning race, gender, sexuality, ethnicity, or other intrinsic characteristics. |
Foreign language | The review is written in a language that is different from your store language. |
Contains private information | The review contains confidential or private information. |
Unrelated to the product or service | The review is completely unrelated to your brand’s products or services, including your customer service, delivery, returns, and exchanges. |
False or misleading | The review makes favorable performance claims that are clearly false or misleading and that you could not make yourself. |
Fake | You have actual proof allowing you to say with a reasonable degree of certainty that the review is fake and not written by a real customer. |
To reject an individual review:
Under the relevant review, click Reject.
From the dropdown, select the reason you are rejecting the review.
To reject multiple reviews:
Mark the check box next to the reviews you'd like to reject or click Select All to select all reviews on the page.
Click Action > Reject, and then from the dropdown, select the reason you are rejecting the reviews.
Tip
To view all rejected reviews along with the reason they were rejected, in the Filters area, click the Rejected status.
Commenting on Reviews
Publicly or privately reply to your reviewers so you can thank them, resolve issues, or simply let your shoppers know you’re listening. You can add a maximum of one comment per review.
Action | Description |
|---|---|
Make a public comment on a review | 1. Click Comment 2. Enter the comment content 3. Select Public 4. Click Post The reviewer will receive an email notification and the comment will be publicly displayed as part of the review on your store's website.
|
Make a private comment on a review | 1. Click Comment 2. Enter the comment content 3. Select Private 4. Click Post The reviewer will receive an email notification. If you have auto-publish set up, privately commenting on a review will not prevent it from being published 14 days after it was submitted by the customer. To learn about auto-publishing, go to Auto-Publishing Reviews. |
Edit a comment that has already been made | 1. Click Comment 2. Click Edit and modify the comment content 3. Click Done to update the comment |
Delete a comment from a review | 1. Click Comment 2. Click Delete |
Modify the comment type (Public/Private) | 1. Click Comment 2. Select Publish |
Adding a hyperlink to a comment | Link your customers to other products or pages on your site by adding hyperlinks to a comment on a review or an answer to a Q&A question. Add the desired URL to your text and the URL will automatically become clickable upon submission.
|
Tip
Sharing Reviews and Review Media
Easily share your reviews - including images - on your store's social media pages or generate Facebook Ads at the click of a button.
Action | Description |
|---|---|
Share a review on your store's Facebook page: | 1. Under the review and on the right, click the three dots (ellipsis) icon. 2. Click Push to Social > Push to Facebook. |
Share a review on Pinterest | 1. Under the review and on the right, click the three dots (ellipsis) icon. 2. Click Push to Social > Push to Pinterest. Learn more about Pushing User-Generated Media to Pinterest |
Note
It is only possible to share one review at a time.
Marking Reviews as 'Incentivized'
You can mark any review as incentivized and add information as to which incentive the customer received as a reward for the review.
Tip
To learn more about incentivized reviews, see Understanding Incentivized Reviews.
To mark a review:
1. Under the review and on the right, click the three dots icon.
2. Click Mark as incentivized and choose the reward type.
The reward type will be visible on-site as part of the display of the review in the Reviews Widget. To learn more about the Reviews Widget, see Adding the Reviews Widget.
Adding Media to a Review
Moderate user-generated images and videos to ensure that they are appropriate before publishing to your on-site widgets and social pages. The images or videos will only be displayed in published reviews.
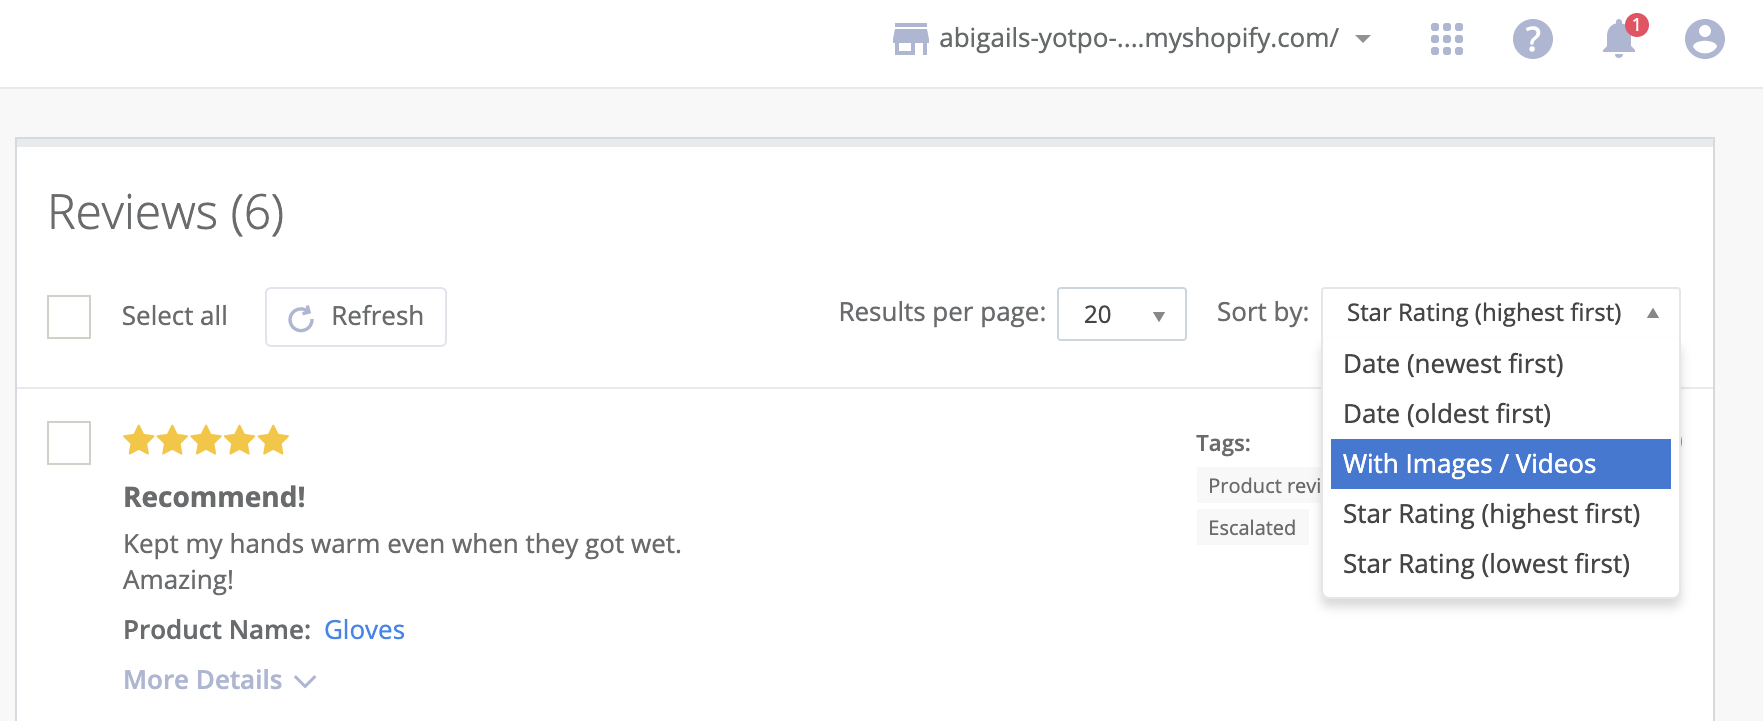
To view only reviews containing media, in the top right corner of the screen, click Sort by: and then select With Images / Videos. Reviews that do not contain media will now be filtered out.
To include user-generated media in your review, check the box on the media you'd like to include in your review, and then click Publish.
To remove user-generated media from your review, just unselect the check box next to it.
Tip
If you want to add media to a review that has already been published, simply check the box on the media you'd like to add to the review and the review will be automatically updated.
Re-Sending a Review Request
Resending a review request allows you to send your customers an additional review request email to replace an outdated or inaccurate review with a new one. Improving the review content by resending a review request may positively impact your Google Seller Ratings, Rich Snippets, and Product Listing Ads.
There are several scenarios which may justify a review resubmission request:
You'd like a customer to send a follow-up review. For example, the customer wrote a negative review due to an issue with the product or service, and corrective action was taken to resolve the issue
The customer wrote a great review about your product or site, however, the review includes profanity, spelling errors, typos, or was poorly written
The customer wrote a review that’s no longer relevant to your business and you’d rather exclude it from appearing in Google search results
To learn more about resending review requests click here.
To resend a review request:
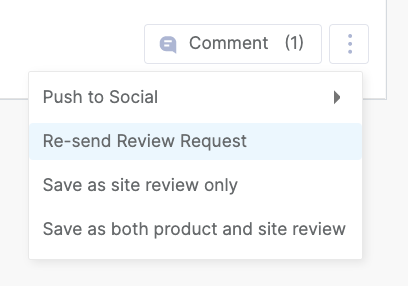
In the 3-dot menu, click Re-send Review Request.
Complete the form.
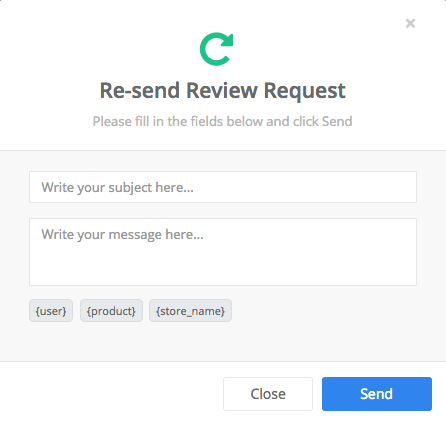
Click Send.
Important
The Re-send Review Request feature will not appear if you have enabled the Email Template Editor for your Automatic Review Request emails. To enable the 'Re-send Review' option, restore Yotpo to its default settings.
FAQ
Does the reviewer get notified of any action taken on their review?
Customers will not receive notification about most actions taken in the moderation section (including rejection).
There are only two available actions that trigger a notification to the reviewer:
Commenting on a customer's review
Resending an automatic review request
Can any site visitor indicate whether a review was helpful or not?
Yes, every visitor can vote on a review, but they only have one vote per review:

How many times can a single visitor engage with the voting feature?
A user can only submit one vote per review. However, a user can choose to change their vote or cancel it altogether.
How does up-voting/down-voting affect the review?
These votes will affect the location of the review within the Reviews Widget following the reviews sorting logic set up in your account
Can I edit or modify a review?
To maintain the integrity of your reviews, we do not allow editing or modifying reviews in the Moderation panel. If you believe a review contains inaccurate information or was submitted in error, we recommend you reach out to that customer with a manual review request so they can submit a new review.
How long do newly published reviews take to appear on-site?
It can take up to 4 hours for a comment or newly published review to appear on the Yotpo onsite widgets
How long does it take for rejected reviews to be removed on-site?
It can take up to 4 hours for rejected reviews to be removed from the onsite widgets.
How long does it take for imported reviews to be displayed on-site?
It can take up to 4 hours for newly imported reviews to appear on the Yotpo onsite widgets.
Can I delete a review that I don't want to display?
Yotpo does not support content removal in compliance with FTC guidelines, except for specific reasons. However, if you prefer not to display a review on your widgets, you can either unpublish or reject the relevant reviews through the Yotpo moderation page.
Can I search for specific reviews in Yotpo?
You can search for reviews through the Moderation page in the Yotpo dashboard. Use the search field to find reviews by content or reviewer's email, and apply filters like Date Range, Star Ratings, Product, Tags, and Review Sources to refine your search.
If I reject a review, will the shopper be able to submit another one?
Yes, if a review is rejected, the shopper can still submit another review. Rejection of a review typically pertains to the specific content of that submission, and it does not prevent the customer from submitting a new review that complies with the guidelines.
Was this article helpful?