- DarkLight
My Activity On-site Module
- DarkLight
The My Activity module is a highly-customizable way to greet your customers and show them their activity in your loyalty program. You can deploy a new module in minutes, with no development required.
In this article find out how to access, customize, and deploy the My Activity module on your site.
Accessing the Editor
Accessing via the Rewards Page Builder
To access and edit the section via the Rewards Page Builder, do the following:
- In your Yotpo Loyalty & Referrals main menu, go to Diaply On-site > Rewards Page Builder.
- Click Create Rewards Page or click the existing page you want to edit.
- Click My Activity Section.
- Proceed below to the next step, "Customize settings"
Accessing as a module
- In your Yotpo Loyalty & Referrals main menu, go to Display On-site > My Activity.
- Click Edit on the instance you wish to edit or click "+ Create new"
Customizing the module
Fonts & advanced settings
Fonts & advanced settings > Design & header
Background color
Choose whether you want to add a background color or have the widget be transparent.
Fonts
The primary and secondary fonts are two fonts that will apply in several places throughout your module.
- Primary font
The font you choose here will apply to Step upper text and Module header, Greeting, Points balance, all buttons, Rewards history table title - Secondary font
The font you choose here will apply to Step lower text and all text inside the rewards history table
Advanced
- CSS editor
If you'd like to make further customizations to the module, use our embedded CSS editor. If need to make any overriding changes to the My Activity Module CSS, use this class name before the class you want to override:
.yotpo-widget-my-rewards-widget.yotpo-widget-override-css {
}
If you are using the CSS Editor, you may see a notification asking you to update your Module version from time to time. Read more about Module Versions.
Make sure to use our embedded CSS editor instead of hardcoding directly onto your storefront.
We will not update a specific Module instance if we detect that it will impact your live Module version. Our team can only detect these issues if the CSS is in our editor.
Logged out state
These are the settings that appear when the customer is logged out.
Logged out state > General text
Module header
- Header text color
- Header font size
Logged out state > Customize steps
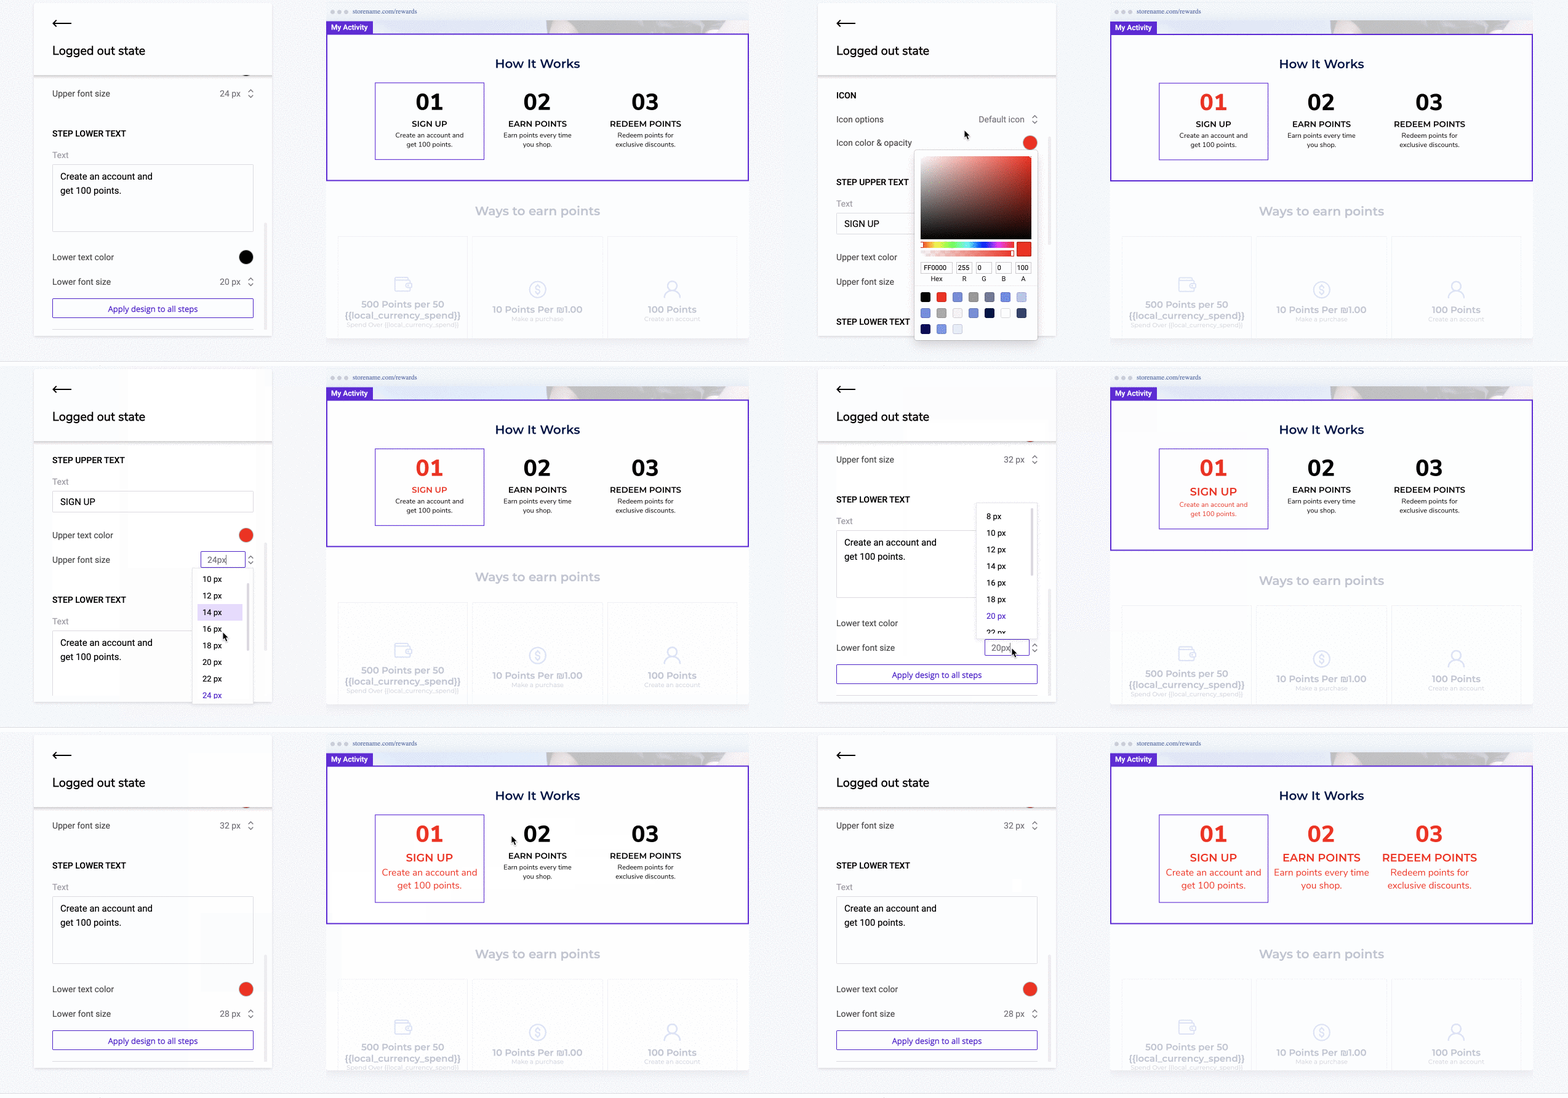
Select a step to customize
Icon options
- Choose either: Default icon, Upload the custom icon, or No icon
- Icon color & opacity
Step upper text
- Upper text size
- Upper font color
Step lower text
- Lower text size
- Lower font color
Apply Design to All Tiles
This is a quick and easy way to apply changes to your tile design. Clicking Apply design to all tiles will take the following design settings and apply them across all the tiles:
- Icon color
- Upper text color & size
- Lower text color & size

Logged in state
Greeting
Customize the greeting your customers will see. You can choose to include the customer's name which will auto-populate. You can choose to include their first name with the variable {{first_name}}, and the last name by using {{last_name}}.
- Greeting color
- Greeting font size
Customer status
Show the customer their VIP tier status and points balance.
The balance must ust include at least one variable, either:
{{current_point_balance}} - This shows how many points the customer currently has. For example 500 points.
{{points_as_credit}} - This shows how many points the customer has in terms of store credit. For example $5.00.
Primary button
- Button style
- Button color
- Button font color
- Link destination
Choose either "Redemption module" which will automatically link to the first redemption module on the page or a custom URL.
Secondary button
- Button style
- Button color
- Button font color
Rewards History
Rewards history lets the customer see a record of their activity, the status of their rewards, and the expiration date of their points. You can also choose to deploy the rewards history as a stand-alone module anywhere on your site.
Rewards history > Look & feel
Overlay
- Color & opacity
Table design
- Style
- Row background color
- Points color
Table title
- Table title color
- Table title size
Rewards history > Table content
Reward display options
Choose either to display the number of points or to display points as credit.
Column headers
- Date column
- Action column
- Points column
- Status column
Status values
- Approved status
- Pending status
- Refunded status
- Reversed status
Deploying the My Activity module
For your Module to appear onsite, you need to embed some code onto your site.
See a guide for Embedding Modules on Shopify.
Deploying via the Rewards Page Builder
If you are building your 'My Activity' Section with the Rewards Page Builder, follow the steps for publishing your Rewards page.
Activate Page/Module
Active
If your module is active (green dot), this means that any changes you publish will be reflected on your store if the module snippet is embedded.
Inactive
If your module is inactive (yellow dot), this means that any changes you publish/save will not be reflected on your store. This also means if you had the module snippet embedded and active on your store before, it will not be visible when inactive.
Advanced customizations
There are some additional customizations that can be made to the module if you are savvy with code. See below some advanced options.
Deploying only Rewards History
You have the option to display the rewards history as a standalone module anywhere on your store website and link it to any button.
- Add this code on the page you want to deploy the rewards history:
<div class="yotpo-widget-instance" data-yotpo-instance-id="xxxx" mode-rewards-history-only="true"></div>
Make sure to replace "xxxx" with the instance ID. To find your module's instance ID, follow this article
 - Add this class to your button code:
yotpo-rewards-pop-up
You're all set!
Attributes
The following attributes can be added to your module's code snippet, just after your instance ID.
For example, if your module's code snippet looks like this:
<div class="yotpo-widget-instance" data-yotpo-instance-id="0000"></div>
Then add the attribute here:
<div class="yotpo-widget-instance" data-yotpo-instance-id="0000" add-attribute-name=value> </div>
If you want to add multiple attributes, add them one after the other, separated by spaces.

Hide coupon codes attribute
You have the option to hide the coupon codes by adding an attribute to your code snippet
"display-coupon-code=false"
For example, if your module's code snippet looks like this:
<div class="yotpo-widget-instance" data-yotpo-instance-id="0000"></div>
Then add the attribute here:
<div class="yotpo-widget-instance" data-yotpo-instance-id="0000" add-attribute-name=value> </div>
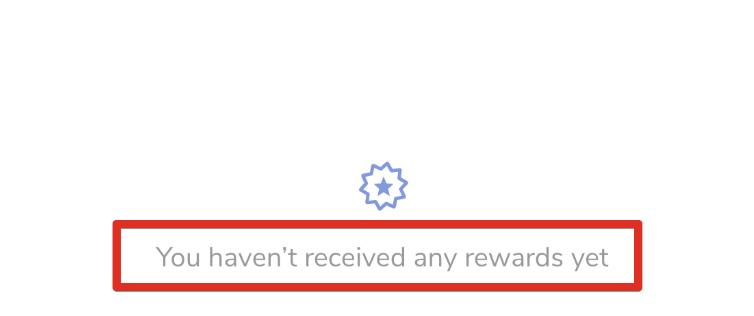
Translate 'You haven't received any rewards yet' module message attribute
Use the attribute rewards-history-no-rewards-text to translate the empty-state message to a language of your choosing.


