WooCommerce: Installing Yotpo Reviews
- DarkLight
WooCommerce: Installing Yotpo Reviews
- DarkLight
Article summary
Did you find this summary helpful?
Thank you for your feedback
This guide will walk you through the process of integrating Yotpo Reviews into your WooCommerce store.
Before you start
Before you start, please do the following:
Make sure you have a Yotpo Reviews account. If you don't already have one, you can pick a plan and sign up here
Check the Supported Platforms guide to ensure your hosted eCommerce platform and version are supported by Yotpo.
Please note:
Currently we don’t support third-party builders (e.g., Elementor, Divi) with our plugin. However, please see this article for further assistance.
Installing Yotpo Reviews
For the installation process to go smoothly, we recommend that you follow the instructions carefully and ensure that you do not skip any of the steps.
Please note:
Changes to on-site widgets (Reviews Widget, Reviews Tab, etc.) may not immediately reflect on your live site. Click here to learn more.
Step 1 - Installing the Yotpo Plugin
Access your WordPress admin.
Click on Plugins.
Click Add New.
Type Yotpo into the search box and hit Enter. The Yotpo plugin should appear.
Click Install Now.
Wait for the installation to finish.
Click Activate.
Log in or register.
Fill in the following fields
App key
Secret key
Order Status
Tips:
For instructions on how to find your app key and your secret key, click here
We recommend changing the default order status from 'Pending Payment' to 'Completed'. Orders with this status will be considered ready to be sent to Yotpo and trigger the automatic review requests.
Customize any additional Yotpo settings you would like to change and click Update.
Step 2 - Enable reviews for your store
This step is valid only for WooCommerce versions 3 and above. If you have an older version, you can continue to step 3.
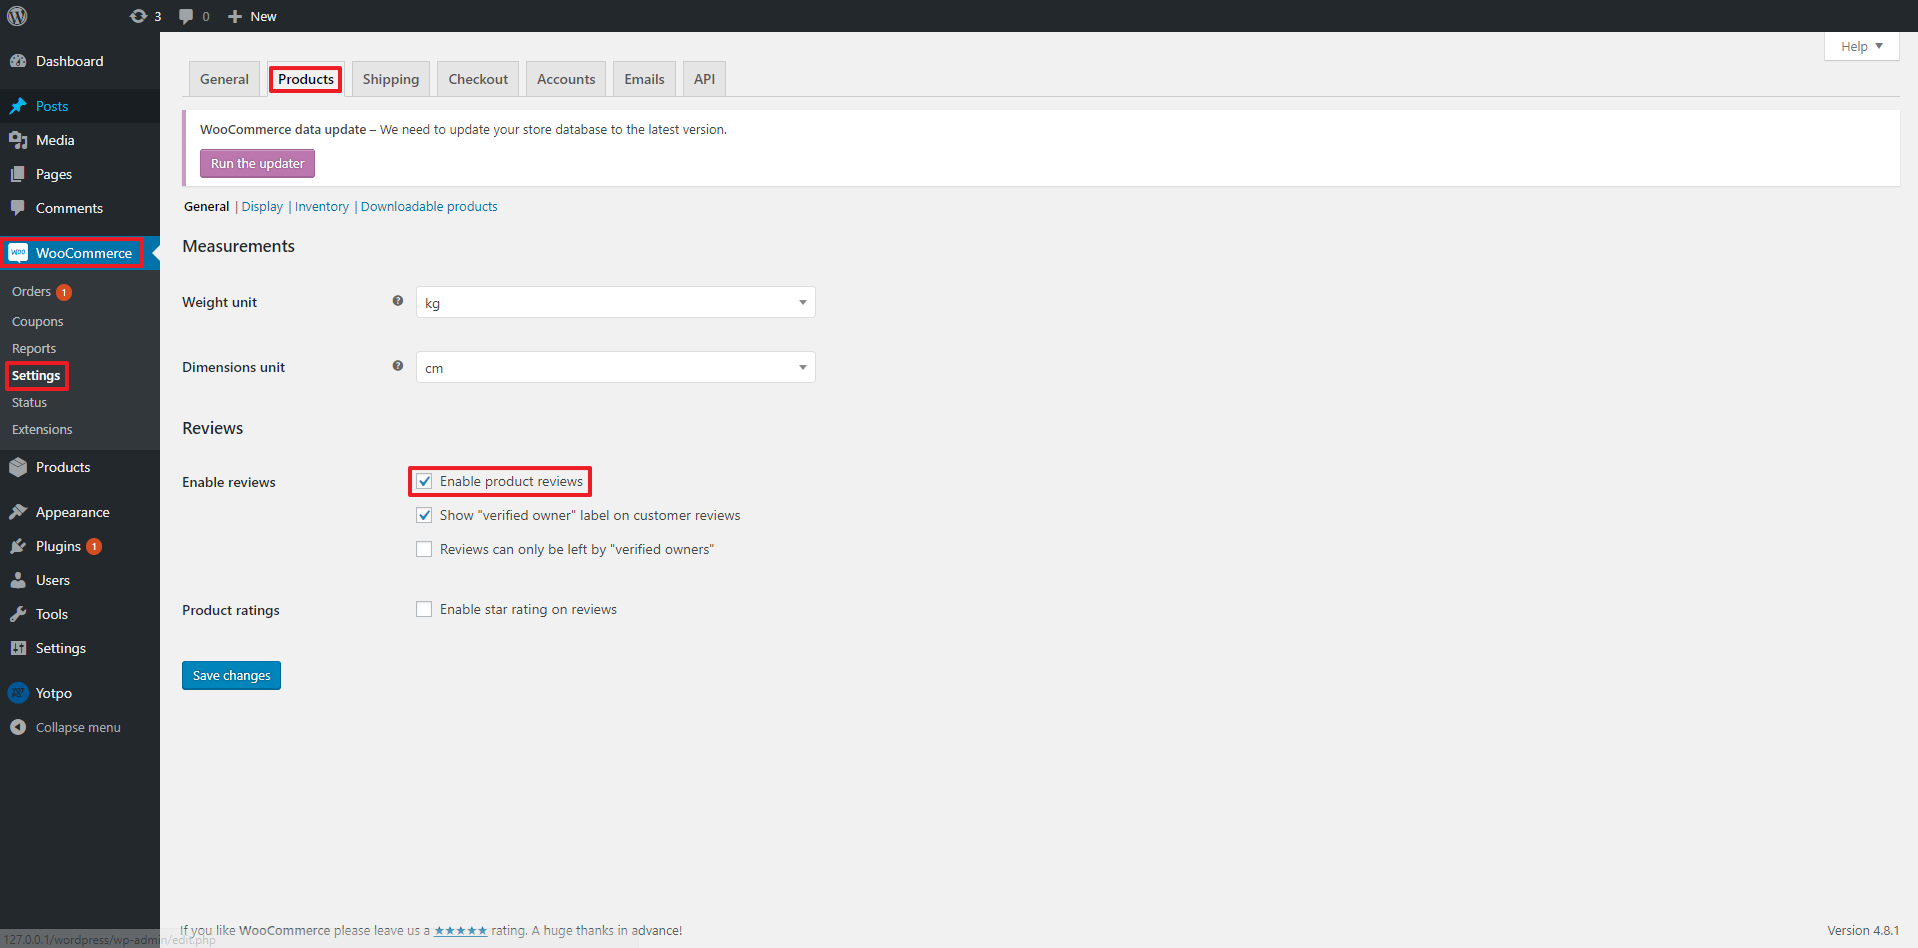
Access your WordPress admin.
Click WooCommerce.
Click Settings in the dropdown menu.
Click on Products.
Check Enable Product Reviews.
Click on Update to save the changes.
Step 3 - Installing Yotpo elements on product pages
When you install and activate the Yotpo Reviews app, the following elements are automatically added to your WooCommerce store:
Yotpo's JavaScript
You can also choose to add the Q&A widget to your pages. To learn more, about the widget, go to Q&A Widget Overview.
To choose which widgets appear on your site:
Go to the Yotpo Reviews plugin.
Check the boxes of the relevant widgets to have them appear on your site.
If you wish to manually install the widgets, check out our Manual Installation Guide.
Update your widget version to 3.0 widgets
To use the latest on-site widget version:
Go to the Yotpo Reviews plugin.
Under the Widget version choose V3.
Check the boxes of the relevant widgets to have them appear on your site.
Click Update.
Step 4 - Importing your reviews to Yotpo
Log in to your WordPress admin.
Go to the Yotpo Reviews plugin.
Click Export Reviews.
Use the online support form to send the file, and Yotpo will import the reviews for you.
Reviews Widget troubleshooting
If the Reviews Widget does not show on some or all of your product pages, check if it is enabled for those specific products according to the following instructions:
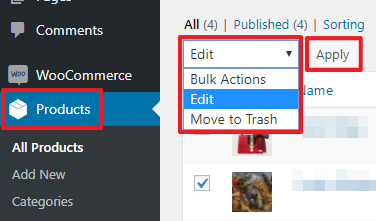
Access your WooCommerce admin.
Click on Products on the left sidebar.
Select all products (or specific products) where you would like the Reviews Widget to display.
Open the Bulk Actions drop-down menu and Click on Edit.
Click Apply.
Next to Comments, select Allow from the dropdown menu.
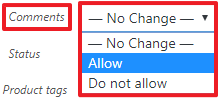
Click Update to save the changes.
Was this article helpful?